Thursday, March 18, 2010

Adorn Me! 2010--Evening Day 2 & 3

One of the lessons I learned at Adorn Me!  this year was that it's probably not a good idea to take an evening class on a day when I have a day class.  The first day with the sawing class wasn't so bad.  I think I was wired with excitement and that it carried me through the very long day.

Wednesday and Thursday I was very tired during my evening classes.  I could tell my brain wasn't working as well as it should be.  I still had a great time though. 

"Fun & Funky ring"
fun funky ring

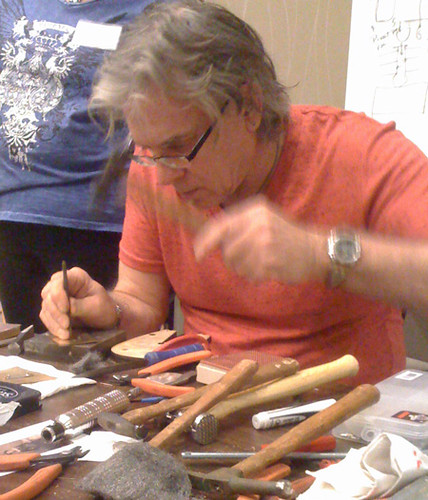
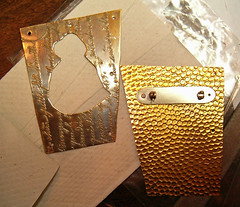
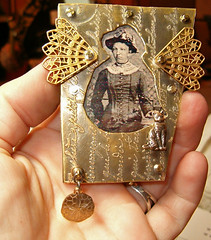
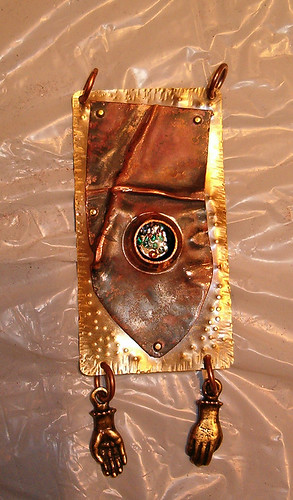
Wednesday evening was Jane Salley's Fun Funky Rings class.  I only got the one ring done.  I got to use the dapping blocks and the disc cutters, which I loved. I had never used disc cutters.  I did get parts of other rings done.  Jane is a lot of fun and the class was kind of like having "playtime."  We used several methods of cold connections: rivets, mini nuts and bolts, etc. 

knot bead pendant
knot bead pendant

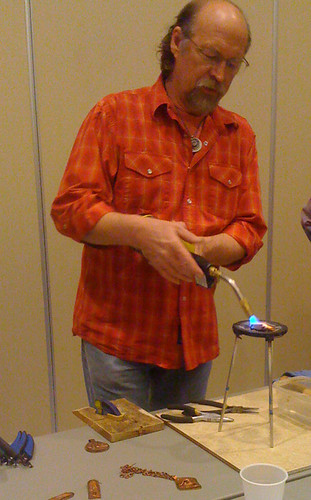
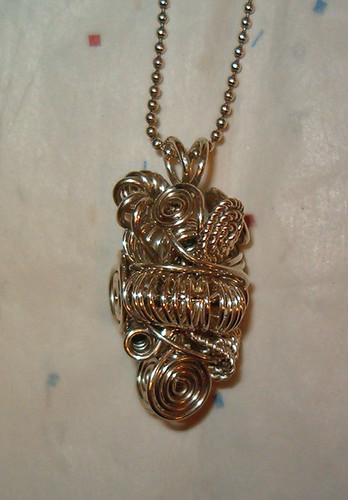
Thursday evening was Melanie Schow's Knot Bead Pendant class.  This was a great class and I enjoyed it very much. Melanie made the complex bead seem easy and she had a great handout with photos. Check out her amazing coiled jewelry here.

I was going to antique this bead when I got home, but now I've decided to leave this one as is and make a second to antique, and a third out of copper...

Monday, March 15, 2010

Adorn Me! 2010--Day 2 & 3

The two day Found Object Sandwich (FOS) workshop with Thomas Mann was the most challenging workshop I took.  It was also a great experience and I'm so glad I had the opportunity to take it.  He's a great teacher.

I had a tintype from my collection to use for the photo.  I wasn't really sure where I was going with it and hadn't planned a design before class.  The first part of the class was spent getting our photos scanned and sized and designing our brooches. I was looking through the embellishment items when I found a cat and the sand dollar and knew what I story I wanted my brooch to tell.

The difficulties I had sawing the night before had been on my mind.  One of the things I've learned in teaching Pysanky (Ukrainian Eggs) is that most beginners need to avoid parallel lines until they have practiced a little. I usually teach designs with a straight line next to a wavy line.  I decided I should probably avoid parallel lines in sawing until I got better at it. The inside line would follow the contours of the photo and the outside line would be mostly straight sections. 

Thomas Mann teaching
Thomas Mann demostrating use of center punch.

When I took a sketch of my shape to show Thomas Mann he held my drawing up to the class and pointed out that I had given myself the easiest shape to saw! I hoped he was right.  My straight lines hadn't been very straight the night before.

The first part that gets sawed is the interior line.  My sawing was much better than the previous night!  I don't know why--maybe "sleeping on it" works for sawing.  By the end of the first day I had completed sawing the sandwich. 

The second day I etched the front plate, did some drilling, tapping, riveting, filing, antiquing, and the sandwich was assembled. 

components
riveting the pin back before assembly

Here she is:

my found object sandwich

I don't know who this young woman was.  She represents my many times great aunt LaPeyre.  During the 1900 storm at Galveston she gathered her nieces and nephews into the upper floor of the house where they survived the storm that killed thousands. At the height of the storm a chest of drawers floated through the window with a cat clinging to it.  She saved the cat.  After the storm the family moved from Galveston.  They took the cat with them.

Adorn Me! 2010-- Day One

March 1-8th I was in Houston for Adorn Me!  I had a blast and learned a lot during the workshops.  I'll be posting for the next several days on my classes and experiences. 

One of the hardest things was deciding what workshops to take. I'm mostly self taught or I've learned from books and magazines. I made my final selections by picking the things I wanted to learn that I thought would be very difficult to learn without an instructor. 

Monday was meet the artists night.  I also met my roomies for the event: Bren and Julie.  They were the best roommates and I am so glad I got to know them. From left to right here's Bren, me, and Julie:

Adorn Me! Houston 2010

Bren is wearing her trades necklace.  Participants brought charms to trade and Bren put hers on a chain necklace.  It looked good and garnered lots of attention. Julie is wearing her Window pendant. 

DAY ONE: Tuesday

Bren and I both had Richard Salley's "Caught in a Trap" class. We cut our metal with tin snips, learned to foldform copper, then dapped it (domed for your non-jewelry people) and filed an opening for our cabachons.  The copper was riveted to a brass backplate. 

Richard Salley is a terrific instructor.  He's annealing a copper plate here:

Caught in a Trap Class

 I was able to get the pendant finished and got the earrings half done.  Bren finished a pendant and earrings.  Several of the students got three or four pieces done.  Check out the fan photos on Richard's facebook page.  There are a lot of photos from this class and some from the Shield class later in the week. 

My Pendant


I textured the brass backplate with a hammer and a center punch.  I hit the brass with the torch to darken it a little.  All of the antique color on the brass and the copper is from the torch.  The cabachon is a vintage Czech glass cab from the 1940's. 

I left this class with my head spinning with ideas and wanting to get my hands on more cabachons. 

EVENING:

I had Thomas Mann's "Learn to Saw" class in the evening.  I had never used a jewelry saw before. This was a technical class and we learned how the saw works, not just how to manipulate the saw. Understanding how the saw works is particularly valuable when turning corners. I didn't take any pictures of the little parts I sawed because they looked terrible. My straight lines weren't straight and my curved lines zig-zagged. I sawed very slowly.  On the plus side, I only broke one blade.

At the end of the class I figured sawing was something that would  take about six weeks of practice before I would end up with something I would want to wear.  I had signed up for Mann's two day Found Object Sandwich workshop and was now worried about how bad my FOS might look after I sawed it out.  I reminded myself that it was better to have problems when there was an instructor available to help you correct them versus having problems when you're on your own.

Back in the room Julie, Bren, and I finished the evening with show and tell. Getting to see what they made and talking about the classes and what we had learned became a daily ritual and one of my favorite parts of the week.

Next post: my Found Object Sandwich.

Saturday, March 13, 2010

Sherri Haab Jewelry Inspirations


Jewelry Inspirations differs from Haab’s other books because it focuses not just on techniques and projects, but on the inspiration for those projects. The book is very well illustrated with color photographs. A wide variety of materials, techniques, and mediums are used to make the projects.


I’ve been looking for ways to incorporate a mixed-media approach to my jewelry line and this book is a perfect starting place.


The first section, In the Studio, starts with development of creativity and inspiration, and ends with basic jewelry techniques needed for the projects. Haab urges artists not to let fear of imperfection get in the way of creativity and to enjoy the process of creating as much as the end result. She touches on studio organization and discusses her use of “inspiration files” of magazine clippings, sketchbooks, and notebooks. Basic techniques detailed in this section include wirework, epoxy resin clay, image transfers, making silicone molds, resin, firing metal clay, patinas, and knots.


The following sections are arranged by inspirations and projects. I counted 26 projects, not counting the variations on the earring projects. I was especially interested in the Seasons section which included a very interesting button and resin project. Another favorite is The Blast from the Past section which includes several projects involving fiber, including two that use spool knitting and Viking knit with wire. These two projects are probably the most advanced projects.


Other techniques used in projects include etching, molding by hand and making and using molds, precious metal clay, and polymer clay.


The book concludes with a listing of contributors, resources, and the index.


The wide variety of materials and techniques make this a good book not only for the beginning jewelry artist who wants to try different things, but also for experienced artists who want to add new techniques to their repertoires. The book reminds me of the reason I started making jewelry--it’s fun.


PS: The rings on the cover aren’t lampwork; they’re epoxy resin clay. Cool, huh?