Friday, December 31, 2010

I Won't Tell if You Won't and

A very Shaggy Christmas


Other Snippets from a Todd Family Christmas

My parents, my husband, our son, and I are all in the car headed to the family Christmas on Christmas Eve at my brother's.  I'm driving and we're in the driveway negotiating the cattle gate.

Me:  "Dad, did you check the mail?"
Dad:  "What?"
Me, loudly: "Did you check the mail?" 
Dad, louder: "What?"
Me:  "Never mind.  We should have checked it on our way in." They have a rural box some distance from the house. 
Hubby:  "You can check it now.  Drive up on my side."
Dad: "What?"
Me, very loudly: "The mailbox, Dad."
Mom:  "You can drive up to the mailbox from the gate because I had it put in the right place."
Me: "Good thinking, Mom."
Our son, who has his earphones in and hasn't heard a single word we've said now realizes I've shouted something.
Son:  "Do you have to argue?"
Me, as I drive to the mailbox:  "It's a Todd tradition.  We love to argue."

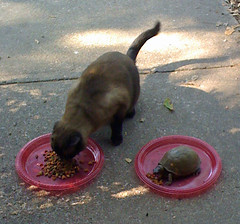
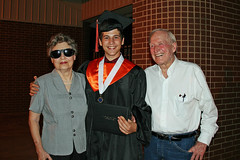
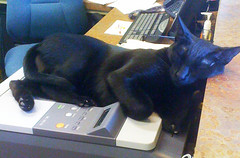
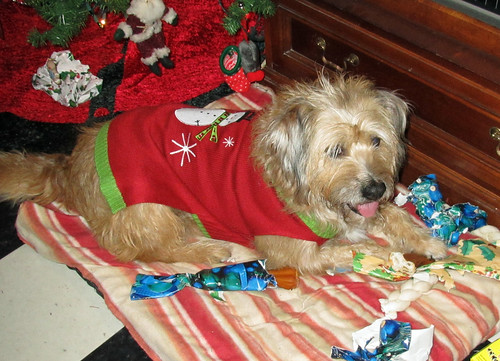
And we had a great Christmas at my brother's. I managed to take a lot of bad and not so great pictures, except the one above of Shaggy. All but my brother's oldest made it in for Christmas, although the youngest was at work Christmas Eve and we had to leave before she got home. 

There was no arguing.

There was this later after most of the presents had been opened....

I hand my Dad an envelope with our main present to them, which is money.  "Okay," Dad jokes. "If you don't tell Mom about this I won't tell her." We both laugh.

A while later I sit down next to Mom on the couch and see an unopened card addressed to "Mom and Dad."  I hand it to Mom and help her by reading it.  (Mom is blind.)

"It's from C and L (my brother and sister-in-law.)" I say. "There's money in it." Coincidentally, it is the exact same amount of money that we gave Mom and Dad.

I cannot resist. "Mom," I say.  "I won't tell Dad about this if you won't."  And both of us laugh. 

Thursday, December 2, 2010

More Solder Play--Birds and Insects, Oh My

work in progress

I'm still working on Stephanie Lee's Homesteaders Metalsmith class. I tried soldering some stampings onto my flooded pieces.  The crown was the first one I did and I toasted it pretty well.  I think after I put a patina on it I'll be able to use it. 

These are all still works in progress.  The piece with the round bezel will eventually get resin in it, and I think I'm going to use my letter stamps to stamp a word below the big bird.  They all need holes for attachment rings and dangles.

Tomorrow I hope to get some chain done and more pendant pieces.

Sunday, November 21, 2010

Solder Play

I've been taking Stephanie Lee's Homesteaders 2 online class.  Here's a few pics of my works in progress.

first floodings

These are small pieces of brass that I flooded with solder.  I'm satisfied with the flooding, except for the bottom two that I used a different solder on, but my bezel making with the copper pipe isn't going so well.

first copper bezels soldered


The solder is kind of grainy looking after I heated it again to solder the bezels.  And I'm having trouble getting the bezels covered completely with solder on the outside.  I need more practice but I'm having fun with the class. I've antiqued the bezels above with Novacan patina.  It did cover the little bare copper spots. I think I'll go for a "dug up at an archeology dig" look with whatever I put in them. Until I can do better things are going to look rustic.

Tuesday, November 16, 2010

Chain and Bead Jewelry, Geometric Connections

Scott David Plumlee makes chain jewelry very approachable and the designs are fresh and engaging. I've always been interested in chain jewelry but before I saw this book it seemed too time consuming and imposing.


I got excited when I thumbed through this book and saw all the earring and pendant designs.  One of the most versatile designs is the Tripoli.  I have lots of ideas for using the Tripoli formation in different ways.  Following the directions in the book I made some 18 gauge copper jump rings and made this Tripoli formation:

Tripoli chain formation


It's about an inch high and will be perfect for some earrings when I get a second one made. I sawed all the rings, except for the one on the top right which I cut with pliers.  I need to file it a little.  Plumlee's design in the book called for rings in copper, bronze, and silver.  Since I'm a newbie at this I made mine out of copper.

Plumlee uses the Tripoli formation and other formations as pendants woven into Byzantine and other chain necklaces. The geometric designs also include dimensional  earrings, necklaces, bracelets, and key fobs. Gemstone beads augment many of the designs. 

Chapters 1 and 2 cover basics and tools. Several tables show measurements in both metric and inches.

Chapter 3 covers variations of Byzantine chain and shows several ways to use it with other chains and geometric connections.  Chapter 4 illustrates the very interesting Tripoli formation.  This formation is a building block for most of the designs in the book. It's amazing how many ways it can be combined, either with other Tripoli formations, or with other chains and beads. Chapters 5 through 7 cover triangle, quatrefoil, trapezoid, and pentagon formations.

Several organic forms are covered in Chapter 8, including beaded fish, cross earrings, snowflakes, and butterflies.

 Photography is excellent throughout the book.  The color photos are presented on a white background, and are larger than life size.  There are step-by-step photos accompanying all the instructions as well as many photos of finished jewelry.  Mixed metals are used throughout the book, making it easy to follow the instructions.

Seven chain styles and two flower formations are covered in the book, but the focus of the book is on the geometric shapes.    There's a two page spread that shows all the aspect ratios and indicates the mandrel sizes to use for specific aspect ratios in different gauges of wire. 

The appendix details the use of Argentium silver and how to make headpins with a torch.  Also included are color diagrams of chain variations.  A note in this section refers readers to Plumlee's website for chain configuration tutorials.

Chain beginners (like me) can do one of the smaller projects and have a completed project in a short amount of time.  Intermediate and advanced chain artists will find lots of inspiration and many different and challenging ways to use geometric forms.


Disclosure: The publisher provided a review copy of this book.

Monday, November 15, 2010

And the Winner is...

Shelby of sundownbeaddesigns is the winner of Stephanie Lee's Semiprecious Salvage.  Congratulations Shelby! 

Thursday, November 11, 2010

30-Minute Earrings--Not Your Average Earrings!

This is one of the most inspiring jewelry making books I have ever seen. I'm so glad I purchased this book.

 While there are some beginner projects, many of the projects require metal working skills and tools that a beginner jewelry maker would not have. A beginning metalworker, versus someone who has only done basic bead stringing, could do well with these designs. There are also some designs using metal clays, rather than traditional metalwork.


Some designs call for a rolling mill to pattern metal, but the designs could be made with metal patterned in other ways, like etching or hammering. It's not necessary to have every tool mentioned.

 
I'm pretty sure that many of these would take ME longer than 30 minutes to make. I intend to put this book on my bench, practice and hone my skill on these designs until I can make them in 30 minutes. I love this book!

 The table of contents is pictorial. This makes it very easy to see what page a certain design is on and quickly turn to the instructions.

 The photos are clear and close-up. The photos are all of the finished jewelry or a detail of the finished earrings. There are some line drawings of templates. There are no step-by-step photos.

 The designs are modern and unique. Just leafing through the book gave me inspiration for many different designs. Several of the designs gave me ideas on ways to improve some of my own designs, even though I use different techniques with my designs.


This book is good for those wanting to take their skills to a new level, and for those seeking inspiration with their own designs.


Tuesday, November 9, 2010

Homesteaders 1 & 2 and Book Giveaway

During the summer I had the pleasure of taking Homesteaders' Metalsmithing,  an online  course by Stephanie Lee.  One of the major things I learned was soldering with a torch.  I had some reservations before the course began about whether the online format was a good one for learning to solder, but my fears were completely unfounded.  The class was fantastic!  It's a combination of blog posts, pdf's, videos, and a wonderfully energetic and supportive yahoo group email list.  I learned a lot but didn't get as much done as I'd hoped (I was getting ready for Red River Revel and got sidetracked making jewelry for it.) 

I signed up for Homesteader's 2, which started this week. New material is being introduced in this session, although much of the material is a repeat. The class runs five weeks instead of four. The material is available on-line for several months so the videos and other material will be available for review. One of the new subjects is use of a rolling mill. I gifted myself with an economy model rolling mill after Red River Revel so I'm looking forward to this part. Hopefully I'll get a lot more practice this time around as well as learn some new things.


I ran out to Sears today and got a stand for the bench grinder. We didn't have a place in the garage to mount it and now we do! And it wasn't expensive or hard to put together. Plus, plus! During the last class I did all the filing on the little brass squares and rectangles by hand and it took way too long.


I finished some components but not soldered pieces in the last class.  My friend, Bren, sent me some pictures to use. Didn't she do a great job?  Bren and Julie and I met at Adorn Me! last year and all three of us took Stephanie's online class.


The photo above is Elvis Presley as a child.


Bren used a napkin ring and a clip on earring in this pendant.


This pendant utilizes a skeleton key and scrapbook paper.


This is a dried daisy in an antique bezel, with resin.


A handmade bezel with a photo behind resin, and a screw back earring.


Bren cleverly used some hardware trim on this one.


Check out Julie's blog HERE and look at her work. 

Now for the giveaway.  Homesteader's 1 included a copy of Stephanie's great book, Semiprecious Salvage.  Reading the book is like taking a class.  I love the story format she uses, and the multitude of close up photos.


I already had a copy of Stephanie's book so now I have two.  You can win one of them by commenting on this post.  If you post it to Facebook or tweet it you can get another chance. Tell me about it in separate comments.  Just be sure I have a way to get hold of you, either through an email linked to your profile or leave me your email address. You can spell it out:  "name at suchandsuch dot whatever" instead of using the symbols.  The deadline for comments is noon CST on Monday, November 15th.  Due to the incessant spamming comments by people promoting links to  "adult" sites I've turned comment moderation on.  I'll be out of town on some day trips this week, so don't get stressed if your comment doesn't doesn't get approved right away.  I'll get to it! 

Wednesday, November 3, 2010

Mystery Beads

My aunt gave me a strand of interesting beads that she got at an estate sale.  They look like African trade beads to me, but I've seen a lot of trade beads and I've never seen these.  If you click on the photos you can look at much larger versions on flickr. If the first one isn't large enough,  click on the photo on flickr, go to actions, all sizes, then click the size you want to view.

mystery beads

The strand is about 24 inches long. The long broken bead in the middle is at one side of the strand, opposite the red beads.


mystery bead detail 1

I think the red beads are plastic but I'm not sure. The black beads appear to be horn.


mystery bead detail 2

The dots on the beads appear metallic. It looks like they were applied. Some aren't flat. If I scrap them with my fingernail they get really shiny like some sort of metal, or metallic paint. The stuff that scraps off looks like some sort of corrosion. If anyone knows what these are please let me know.


mystery bead detail 3


update 11/10/10:  I posted about these on the wire wrap jewelry list on yahoo and Perri (who has a similar donut and has seen a strand of these belonging to a collector) replied in part: "...The dots are most likely metal rod inlay (yeah, I know - think about the time
and work - AMAZING!)

The drop beads are definitely horn, look at the striations in the small part
next to the hole - this is also how you can tell they are older - because
although they are pretty well kept, they have dried out enough that the
*growth rings* in the horn can be seen easily. When they were new, they were
probably smooth as the proverbial baby's bottom, as were the inlay beads. My
donut is roughly 25 years old, and still smooth."


I think Perri's right.  I had wondered how the dots could be so uniform in shape and size.  Using rod inlay makes perfect sense.  And it explains why they look metallic--they're metal. 


Thanks to everyone for their emails and info.  And if any reader has more info please comment! 

Monday, September 13, 2010

And the Winner Is...

The winner of the issue of Artful Blogging in my first blog giveaway is Corrie.  Corrie has quite a few giveaways listed over on her blog, Corrie's Contest Cache. Check it out. Congratulations Corrie!

The process of selection involved the order of the posts and me telling my husband to pick a number from 1 to 5, inclusive.  He picked 2.   He never reads my blog so I figured that made him fairly neutral. 

I'll be starting a giveaway for a copy of Stephanie Lee's excellent jewelry making book, Semiprecious Salvage: Creating Found Art Jewelry,  later this week.  If that's something you might be interested in check back. 

I'll leave you with a fun picture of Pawlie and Yertle. Click for a larger view over on Flickr.

Pawlie and Yertle


Yertle has been hanging out at our house during the warmer months for several years now. For all I know, he's wintering-over under our hedge or in the woods across the street during the winter.  He (she?) has a fondness for cat food.  Yertle wasn't sure he liked Pawlie being so close to him but it didn't stop him from chowing down.

Wednesday, September 8, 2010

Percolator and My First Giveaway!

IMG_1275web

I've been playing with my new Percolator iPhone app.  It's so much fun I wish I had a Percolator version for my laptop.  I percolated this from a photo I took of a water lily in the gold fish pond.

IMG_1284web

Here's a lizard.  I love the way the app makes mosaics. Check out the Percolator group on Flickr here.

Now for the giveaway!  I managed to buy two copies of the July-August-September Artful Blogging, so I'm giving one away.  If you missed getting one or are wanting to check out the magazine here's your chance.  This is one of my very favorite magazines!  It's chock full of gorgeous photography and beautiful blogs, along with tips on your own blogging.

Comment on this post.  I'll randomly select a winner next Monday, September 13, and ship this off to you. Stay tuned, I'll be giving away a book next week.


Update 09/12/10:  There's still time to post a comment.  I'll cut off comments tomorrow evening at 10 pm.


Friday, August 6, 2010

Back to Etching

I'm working on jewelry for Red River Revel.  This is the biggest show I do every year. Last night and today I've been working on etching some copper and brass. 

etched copper plate in the pickle

Here's an etched copper plate.  I annealed it this afternoon and put it in a pickle of vinegar and salt.  The black stuff is bits of black fire scale coming off the back of the plate.  I annealed it face down so the back had the most scale.  It's almost finished in the pickle.  Next I rinse it, bath it in some baking soda water, rinse again, and clean it with 4 0 steel wool. Then it will be ready to cut with my disk cutter and I can dap it (dome it). After that I'll cut holes, antique it (or not), tumble it, and coat it with a permanent jewelry finish.  I like the finish I choose to be trouble free for the customer so I almost always coat my copper. After that it will be assembled into jewelry.

I made a list one time of the steps I go through from beginning to end in the etching-to-jewelry process and there are 15 steps.  Eight of the steps, maybe more, have multiple steps. Sometimes I skip some steps if I'm doing something different.  It isn't always necessary to pickle items after annealing them.  The fire scale can be attractive in some applications.

I love etched script and I found some wonderful script stamps at the Heirloom Productions rubber stamp show in Grapevine Texas last month.  I also got some really cool stamps at one of my favorite vendors,  Lost Coast Designs. I'm going to be using them soon.

One of my new projects is etched light switch plates.  I have some copper and brass switch plates and will be experimenting with them.

Wednesday, August 4, 2010

Great Deals and Tips #2, The Portable Bench

In the last year or so I've started doing more metalwork.  I found that I needed a surface to work on that I didn't have to worry about getting scratched or beat up.  I don't have a lot of room for another table so  I got one of these at my local Wal-Mart:

I got the 29 inch tall one and my friend Billye got the 24 inch one for her studio.  It works nicely for heavy duty hammering on the bench block, and I can take it outside when I'm working on things that have to be repeatedly annealed.  I can clamp my vise on it, or clamp a bench pin on it.  When it's not in use as a jewelry workbench it's in the kitchen.  I frequently sit on it while cooking. Well, truthfully, it's in the kitchen a lot when I'm hammering on it.  The top still looks brand new even though I've worked on it a lot. It doesn't take up a lot of room.

I don't remember the price but it was around $25.00.  I tried to look it up online, but they don't have the exact one I bought.


IMG_1143web

Here I am doing a little fold forming with a copper strip.  I found out that I need a wider vise or a short piece of copper.  I could only get half the strip in the vise at a time. I'm not sure where I'm going with this strip.  I was going to put it on a brass cuff but now I'm thinking of cutting it up and making earrings. There's still a lot of texturing and folding to be done.

This was the first time I'd used my new Fretz hammer.  It's the brown handled one in the back.  It's a great hammer.

Saturday, July 24, 2010

The Dangerous Dark

I walk around outside my house all the time in the dark.  If the neighbors could see me I know they'd think I'm insane because most of the time I have one hand up in front of my face as I'm walking.  This is why:

IMG_1102web

I don't know the name of these spiders, but they are fat brown squatty looking things that build a new web every night. They have nice webs and it's kind of impressive that they do all that work every day. They like to hang their webs out in the middle of an open space where you never expect a spider could put a web. They're sneaky that way. Sometimes the anchor lines are ten feet long.  They almost always hang them with the center about 5 feet above the ground which is face level for me.

Many times I have wrapped one of the webs around my head.  I'm pretty sure people in the next county hear me screaming when this happens, even though I scream with my teeth clenched just in case something wants to run in. I'm not fond of spiders and I'm less fond of the webs actually touching me.  One good thing I can say about these spiders is that they run up one of the support lines when something big walks through the web.  I appreciate them not running around on my face, although it doesn't stop the screaming.

This spider hung her web right above my car hood.  I had a nice shot lined up with my cell phone when Scrappy jumped up on the hood and started walking into the web.  You can see the spider is headed for a support line.  Half a second earlier it was smack in the middle of the web.

This time of year I also have a flashlight.  That's because I don't want to step on one of these:

copperhead snake

Click on the photo to go to my flickr page and see it full size.  This is a copperhead snake. I was on the way out to my small gold fish pond one night a few years ago and saw him next to the sidewalk. I was checking the pond for snakes. There wasn't a snake in the pond but there was a huge spider eating one of the fish.

Copperheads are really hard to see in the leaves like this.  When they are coiled up in the leaves their skin makes a rosette pattern. A few nights ago I caught Scrappy and Pawlie playing with one. I heard a crack and Scrappy jumped up about two feet and back about three.  The crack was the snake striking.  Fortunately, Scrappy wasn't bitten.  I called the cats over to me and looked for what they'd been after.  It took several minutes for me to find the snake.  I didn't see it until it started to move slowly away.  

So if you see me walking around the yard at night with one hand up in front of my face, looking at the ground with a flashlight you'll know...I can explain that. 

Friday, July 23, 2010

Great Deals and Tips #1 - Fabulous Friday Find


This is the first in a new series of posts on great deals and tips relating to jewelry making.  I'll post when I find something or have a tip to share and they'll be searchable under "great deals and tips".


IMG_1139web

I spotted these at Big Lots today.  The cute little hammer was $5.00 and the 6 foot key chain tape measure was $2.50.  And did I mention the hammer is cute?

The hammer is just right for when I need a hammer and don't want to use one of my good jewelry hammers, like when I'm beating the heck out of some found object.  It will fit in a box when I travel. There were matching C clamps, spring clips, and a hobby sized hack saw, but I already have these, although they aren't as cute.

The hobby saw is also a great deal.  It was $3.50 and had several blades. The handle folds up into the frame for storage so it takes up about the same space as the hammer. I have a similar one that I use when I want to cut something and need more than the jewelry saw, but less than a big hacksaw, and don't want to break out the dremel.

My next great deals and tips post will be about the small, inexpensive, and very portable bench I use for a work surface  when I texture and pound on stuff.

Wednesday, June 30, 2010

Summer Goodness

Here are a few photos from around the house and family this spring and summer.

black swallowtail butterfly

Black swallowtails aren't nearly as shy as their tiger swallowtail cousins.

tiger swallowtail butterfly

I did get some shots of a tiger swallowtail.

There were three family weddings this spring:


My niece Angela and Suhail married in New York.


My niece Sarah and Chris married in Cancun, Mexico.


mary & bobby

And their mother Mary married Bobby in Texas after parachuting to the venue.

mary & bobby

My nephew Daniel graduated from high school. Here my father helps him tie his tie.

IMG_5508web


I think Dad's wondering if someone who can't tie a tie is ready to graduate.


IMG_5511web

We had the nosebleed seats.

IMG_5519web2

Here he is afterwards with my parents.

IMG_5616web

The grand finale to the graduation:

IMG_5562web

Back home the garden is doing better than ever.

garden goodness

The Virginia Creeper leaves have already turned.

virginia creeper leaves


That's all for today!

Thursday, June 3, 2010

Susan Tuttle's Digital Layers Class

I've been taking mixed-media artist Susan Tuttle's new online class "Digital Layers."  I'm getting a late start on it, but I'm having a really good time.  I can't wait until the last lessons when we get more into collage. 

Last Sunday we went to a family wedding at Lake Lavon.  The bride and groom parachuted in (that's how they met) and it was a casual affair on the lakeshore. The Cowboy Church preacher married them.  I managed to take 397 photos while we were there.  Don't you love digital cameras? I will be working through them for a while. 

Not all the photos were of the wedding.  I also took some photos of my son having fun at the shoreline.  I took pictures of the waves, the "beach" and a tree for use as texture photos.  

Here's one of the photos I did for the week 1 project 1 of Digital Layers.  As always you can click on the photo and go to my Flickr photostream to view it, and others, in better resolution.  And you can check out the group photos for the class from a link on this photo's page.

W1P1-version2


The photo really looks better viewed in a larger size.  I used a photo of my son at the water's edge for background, and layered another photo of the waves surging over the shoreline, followed by a layer of glass texture from Texture King. Texture King has lots of really interesting free texture photos.  The originals are on the Flickr stream for comparison.
                          
I have Susan's newest book Digital Expressions:Creating Digital Art with Adobe Photoshop Elements.  After I finish the online class I'm working through the book.  The book looks great, and the projects cover some techniques that I've wanted to learn for a long time.  There's a disk included with the book but I haven't had time to look at it yet. 

Friday, May 28, 2010

"Nap" Time is Over

clinic kitty

Wow, I've been a bad blogger. Despite having a list of things to blog about on my to-do list I haven't posted in over two months.


I snapped this shot with my cell phone at my vet's office. I can't remember this kitty's name, but she loves the printer. The clerks lift her hiney up and hold her with her hips suspended  while the machine prints. She doesn't even wake up. She is one of several clinic cats.

Thursday, March 18, 2010

Adorn Me! 2010--Evening Day 2 & 3

One of the lessons I learned at Adorn Me!  this year was that it's probably not a good idea to take an evening class on a day when I have a day class.  The first day with the sawing class wasn't so bad.  I think I was wired with excitement and that it carried me through the very long day.

Wednesday and Thursday I was very tired during my evening classes.  I could tell my brain wasn't working as well as it should be.  I still had a great time though. 

"Fun & Funky ring"
fun funky ring

Wednesday evening was Jane Salley's Fun Funky Rings class.  I only got the one ring done.  I got to use the dapping blocks and the disc cutters, which I loved. I had never used disc cutters.  I did get parts of other rings done.  Jane is a lot of fun and the class was kind of like having "playtime."  We used several methods of cold connections: rivets, mini nuts and bolts, etc. 

knot bead pendant
knot bead pendant

Thursday evening was Melanie Schow's Knot Bead Pendant class.  This was a great class and I enjoyed it very much. Melanie made the complex bead seem easy and she had a great handout with photos. Check out her amazing coiled jewelry here.

I was going to antique this bead when I got home, but now I've decided to leave this one as is and make a second to antique, and a third out of copper...

Monday, March 15, 2010

Adorn Me! 2010--Day 2 & 3

The two day Found Object Sandwich (FOS) workshop with Thomas Mann was the most challenging workshop I took.  It was also a great experience and I'm so glad I had the opportunity to take it.  He's a great teacher.

I had a tintype from my collection to use for the photo.  I wasn't really sure where I was going with it and hadn't planned a design before class.  The first part of the class was spent getting our photos scanned and sized and designing our brooches. I was looking through the embellishment items when I found a cat and the sand dollar and knew what I story I wanted my brooch to tell.

The difficulties I had sawing the night before had been on my mind.  One of the things I've learned in teaching Pysanky (Ukrainian Eggs) is that most beginners need to avoid parallel lines until they have practiced a little. I usually teach designs with a straight line next to a wavy line.  I decided I should probably avoid parallel lines in sawing until I got better at it. The inside line would follow the contours of the photo and the outside line would be mostly straight sections. 

Thomas Mann teaching
Thomas Mann demostrating use of center punch.

When I took a sketch of my shape to show Thomas Mann he held my drawing up to the class and pointed out that I had given myself the easiest shape to saw! I hoped he was right.  My straight lines hadn't been very straight the night before.

The first part that gets sawed is the interior line.  My sawing was much better than the previous night!  I don't know why--maybe "sleeping on it" works for sawing.  By the end of the first day I had completed sawing the sandwich. 

The second day I etched the front plate, did some drilling, tapping, riveting, filing, antiquing, and the sandwich was assembled. 

components
riveting the pin back before assembly

Here she is:

my found object sandwich

I don't know who this young woman was.  She represents my many times great aunt LaPeyre.  During the 1900 storm at Galveston she gathered her nieces and nephews into the upper floor of the house where they survived the storm that killed thousands. At the height of the storm a chest of drawers floated through the window with a cat clinging to it.  She saved the cat.  After the storm the family moved from Galveston.  They took the cat with them.

Adorn Me! 2010-- Day One

March 1-8th I was in Houston for Adorn Me!  I had a blast and learned a lot during the workshops.  I'll be posting for the next several days on my classes and experiences. 

One of the hardest things was deciding what workshops to take. I'm mostly self taught or I've learned from books and magazines. I made my final selections by picking the things I wanted to learn that I thought would be very difficult to learn without an instructor. 

Monday was meet the artists night.  I also met my roomies for the event: Bren and Julie.  They were the best roommates and I am so glad I got to know them. From left to right here's Bren, me, and Julie:

Adorn Me! Houston 2010

Bren is wearing her trades necklace.  Participants brought charms to trade and Bren put hers on a chain necklace.  It looked good and garnered lots of attention. Julie is wearing her Window pendant. 

DAY ONE: Tuesday

Bren and I both had Richard Salley's "Caught in a Trap" class. We cut our metal with tin snips, learned to foldform copper, then dapped it (domed for your non-jewelry people) and filed an opening for our cabachons.  The copper was riveted to a brass backplate. 

Richard Salley is a terrific instructor.  He's annealing a copper plate here:

Caught in a Trap Class

 I was able to get the pendant finished and got the earrings half done.  Bren finished a pendant and earrings.  Several of the students got three or four pieces done.  Check out the fan photos on Richard's facebook page.  There are a lot of photos from this class and some from the Shield class later in the week. 

My Pendant


I textured the brass backplate with a hammer and a center punch.  I hit the brass with the torch to darken it a little.  All of the antique color on the brass and the copper is from the torch.  The cabachon is a vintage Czech glass cab from the 1940's. 

I left this class with my head spinning with ideas and wanting to get my hands on more cabachons. 

EVENING:

I had Thomas Mann's "Learn to Saw" class in the evening.  I had never used a jewelry saw before. This was a technical class and we learned how the saw works, not just how to manipulate the saw. Understanding how the saw works is particularly valuable when turning corners. I didn't take any pictures of the little parts I sawed because they looked terrible. My straight lines weren't straight and my curved lines zig-zagged. I sawed very slowly.  On the plus side, I only broke one blade.

At the end of the class I figured sawing was something that would  take about six weeks of practice before I would end up with something I would want to wear.  I had signed up for Mann's two day Found Object Sandwich workshop and was now worried about how bad my FOS might look after I sawed it out.  I reminded myself that it was better to have problems when there was an instructor available to help you correct them versus having problems when you're on your own.

Back in the room Julie, Bren, and I finished the evening with show and tell. Getting to see what they made and talking about the classes and what we had learned became a daily ritual and one of my favorite parts of the week.

Next post: my Found Object Sandwich.

Saturday, March 13, 2010

Sherri Haab Jewelry Inspirations


Jewelry Inspirations differs from Haab’s other books because it focuses not just on techniques and projects, but on the inspiration for those projects. The book is very well illustrated with color photographs. A wide variety of materials, techniques, and mediums are used to make the projects.


I’ve been looking for ways to incorporate a mixed-media approach to my jewelry line and this book is a perfect starting place.


The first section, In the Studio, starts with development of creativity and inspiration, and ends with basic jewelry techniques needed for the projects. Haab urges artists not to let fear of imperfection get in the way of creativity and to enjoy the process of creating as much as the end result. She touches on studio organization and discusses her use of “inspiration files” of magazine clippings, sketchbooks, and notebooks. Basic techniques detailed in this section include wirework, epoxy resin clay, image transfers, making silicone molds, resin, firing metal clay, patinas, and knots.


The following sections are arranged by inspirations and projects. I counted 26 projects, not counting the variations on the earring projects. I was especially interested in the Seasons section which included a very interesting button and resin project. Another favorite is The Blast from the Past section which includes several projects involving fiber, including two that use spool knitting and Viking knit with wire. These two projects are probably the most advanced projects.


Other techniques used in projects include etching, molding by hand and making and using molds, precious metal clay, and polymer clay.


The book concludes with a listing of contributors, resources, and the index.


The wide variety of materials and techniques make this a good book not only for the beginning jewelry artist who wants to try different things, but also for experienced artists who want to add new techniques to their repertoires. The book reminds me of the reason I started making jewelry--it’s fun.


PS: The rings on the cover aren’t lampwork; they’re epoxy resin clay. Cool, huh?

Friday, February 12, 2010

Snow Day


P020310PS-0033
Originally uploaded by The White House
We've had a record snow in Texas. I'm working on my own snow pictures, but I wanted to share this beautiful photo by White House photographer Pete Souza. Click on the photo to view it on Flickr.


I love this photo, especially the way the flag is framed by the tree limbs and the window with the light showing. The White House is a symbol of our country and government, but all too often I think we forget that it is also a home.