Friday, August 6, 2010

Back to Etching

I'm working on jewelry for Red River Revel.  This is the biggest show I do every year. Last night and today I've been working on etching some copper and brass. 

etched copper plate in the pickle

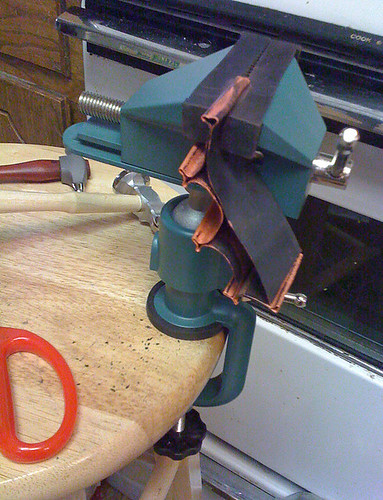
Here's an etched copper plate.  I annealed it this afternoon and put it in a pickle of vinegar and salt.  The black stuff is bits of black fire scale coming off the back of the plate.  I annealed it face down so the back had the most scale.  It's almost finished in the pickle.  Next I rinse it, bath it in some baking soda water, rinse again, and clean it with 4 0 steel wool. Then it will be ready to cut with my disk cutter and I can dap it (dome it). After that I'll cut holes, antique it (or not), tumble it, and coat it with a permanent jewelry finish.  I like the finish I choose to be trouble free for the customer so I almost always coat my copper. After that it will be assembled into jewelry.

I made a list one time of the steps I go through from beginning to end in the etching-to-jewelry process and there are 15 steps.  Eight of the steps, maybe more, have multiple steps. Sometimes I skip some steps if I'm doing something different.  It isn't always necessary to pickle items after annealing them.  The fire scale can be attractive in some applications.

I love etched script and I found some wonderful script stamps at the Heirloom Productions rubber stamp show in Grapevine Texas last month.  I also got some really cool stamps at one of my favorite vendors,  Lost Coast Designs. I'm going to be using them soon.

One of my new projects is etched light switch plates.  I have some copper and brass switch plates and will be experimenting with them.

Wednesday, August 4, 2010

Great Deals and Tips #2, The Portable Bench

In the last year or so I've started doing more metalwork.  I found that I needed a surface to work on that I didn't have to worry about getting scratched or beat up.  I don't have a lot of room for another table so  I got one of these at my local Wal-Mart:

I got the 29 inch tall one and my friend Billye got the 24 inch one for her studio.  It works nicely for heavy duty hammering on the bench block, and I can take it outside when I'm working on things that have to be repeatedly annealed.  I can clamp my vise on it, or clamp a bench pin on it.  When it's not in use as a jewelry workbench it's in the kitchen.  I frequently sit on it while cooking. Well, truthfully, it's in the kitchen a lot when I'm hammering on it.  The top still looks brand new even though I've worked on it a lot. It doesn't take up a lot of room.

I don't remember the price but it was around $25.00.  I tried to look it up online, but they don't have the exact one I bought.


IMG_1143web

Here I am doing a little fold forming with a copper strip.  I found out that I need a wider vise or a short piece of copper.  I could only get half the strip in the vise at a time. I'm not sure where I'm going with this strip.  I was going to put it on a brass cuff but now I'm thinking of cutting it up and making earrings. There's still a lot of texturing and folding to be done.

This was the first time I'd used my new Fretz hammer.  It's the brown handled one in the back.  It's a great hammer.