Yesterday and today I've been playing a little with torch enameling. I haven't gotten much done but I'm having fun.
Here's what I've been working on:
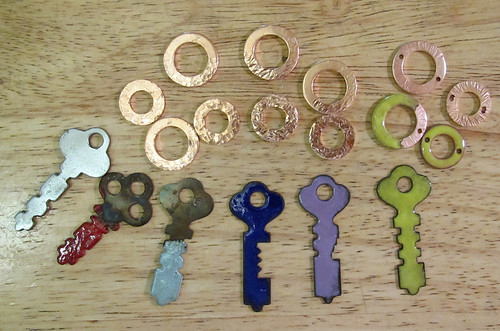 Sorry it's such a poor picture. The steel keys had rust on them and I used the buffer to get that off. The key on the left has been cleaned but not enameled. I used two methods to enamel. I heated the second and third key from the left until red hot and dipped them in the enamel a couple of times, following directions in Barbara Lewis's excellent new book. I did the Robin's egg blue one first. I was pleased with the enameling, although I didn't get it as high up on the key as I would have like. I had some problems with the red one. It threw off sparks or little burning embers when I was heating it. This caused the enamel to pit. I have no idea what caused this but hubby theorized it was bits of carbon flaming up. I haven't cleaned the oxidation from the flame from any of the keys. I rather like the oxidation on the three right hand keys so I may not remove it on those.
The three keys on the right were done by sifting enamel onto one side and torching from below on a tripod. I'm pleased with the way they turned out.
Next I textured some copper washers. I've just begun to enamel them. The half enameled one was done by the dip method and the small one was done by sifting. The small one is textured on the back side and the larger one that I dipped is textured on both sides of the top. The bottom hole filled up with enamel so I'm going to have to rethink that.
I'm so pleased with how the keys came out that I'm going to have a little giveaway. I'm giving away your choice of one of the keys on the right: cobalt, mauve, or bitter green. (The mauve looks lavender to me and the bitter green is a yellow green but those are the enamel names.) I'll also be including enameled copper washers and some other items which will be determined after I go through my stash and find coordinating goodies.
To enter leave a comment on this post. Post on Facebook or follow the blog for extra chances. Just leave me a comment letting me know (if you already follow leave a comment) and be sure I can contact you through your comment or include your email address. I'll cut the comments off at noon on Monday and select a winner sometime later in the day. Good luck!
Friday I had Mixed Metal Milagros with Richard Salley. Milagros are small religious charms used in many Latin American countries, particularly Mexico and Peru. They are also quite common here in Texas and other parts of the Southwestern United States. Read about them here.
Richard told us he was inspired by Lorena Angulo's beautiful hearts and other jewelry to make his own "Milagros." (Lorena was also teaching at Adorn Me. I hope to take a class from her someday.)
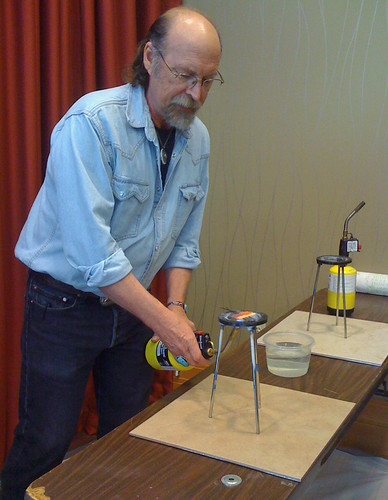
We did some torch enameling in this class in addition to using mixed metals. Here's Richard Salley demonstrating torch enameling.
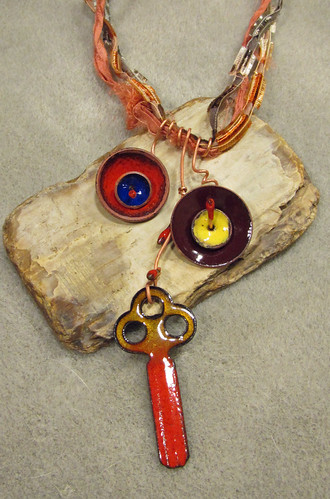
 I had a copy of a gem tintype that I used in my pendant, along with a scrap of etched brass that I sawed into a frame. I used copper and brass. The flaming heart was sawn from copper and enameled. I left the copper showing in the heart with the color from the torch instead of pickling it.
 Everything in this piece is riveted or put together with micro-bolts. The young woman looks likes she's waiting and she has an introspective expression on her face. I imagine she is waiting for her beau, who perhaps is off on a trip or gone to war. I call this pendant "Waiting for my Love."
Thursday was Creating Hollow Forms in Color with Susan Lenart Kazmer. This was the first time I had done any enameling.
After some instruction from Susan I attempted counter enameling of my copper domes. Counter enameling is the enamel put on the back of the piece. It's intended to strengthen the piece so it doesn't get bent later, causing glass to pop off.
The biggest problem I had with this was dropping the little pieces before I got them to the torch. I did finally get the backs torch enameled.
The line for the torches was long so I switched to the kiln for the fronts. I experimented with various colors and also enameled a key, and the tips of some copper wires. The copper wires were done with the torch. It's a lot of fun seeing the colors pop out after firing. At first everything is dark but when it cools, or after you quench it, the color shows. The color on the enamels can change with each firing. The brown looking piece is supposed to be Victorian Red. The backs of the domes, in particular, would have benifited from additional firings if I'd had more time. Each piece was fired twice, except for the wires which were fired 4 or 5 times each.
Here's my completed piece:
 You can see I had a little trouble getting the enamel out to the edges of the copper. I'm definitely going to be ordering some enamels so I can work on the technique.
Bren, meanwhile, was in Keith Lo Bue's Weathering and Distressing class learning how to make things look old. She came back with some boxes with handmade wire clasps on them, distressed down to the wormholes.
Up next: Part B: Band Groupie with Melissa Manley.
You can see I had a little trouble getting the enamel out to the edges of the copper. I'm definitely going to be ordering some enamels so I can work on the technique.
Bren, meanwhile, was in Keith Lo Bue's Weathering and Distressing class learning how to make things look old. She came back with some boxes with handmade wire clasps on them, distressed down to the wormholes.
Up next: Part B: Band Groupie with Melissa Manley.
