Showing posts with label rings. Show all posts

Friday, March 11, 2011

Day Three at Adorn Me Part B: Band Groupie

Thursday evening was Band Groupie with Melissa Manley.  Bren and I were both in this class.  Melissa is a great teacher and is so much fun in class. She really sets everyone to ease and explains things well.

 Melissa had a handy chart to help us determine how long to cut the ring stock for a particular size.  Of course, despite measuring twice and cutting once, I still cut mine one millimeter too short.  This represents 1/4 size if I read the chart correctly.  Next time I'll cut to the side of the line instead of right on top of it.

We textured our rings, bent them into a "D" shape, and then pick soldered them.  I had never pick soldered so I was pleased to get some experience with this.  The rings were then shaped, bevels filed and some polishing and antiquing was done.  I was able to wear my ring, just not on the finger I had intended! My seam was looking pretty good--not showing at all--until I antiqued the ring.  I think a little more polish work will take care of that.

Bren's ring


This is Bren's beautiful ring. Below is mine:

my ring

I used my hammer to gently texture the edge of my band. Now that I'm home I'll do some more polishing and put it in the tumbler for a while.

Monday, July 7, 2008

Tutorial Monday-Mei of Wirebliss

This week for Tutorial Monday I'm reviewing the Sparkly Crystal Ring Tutorial from Mei of WireBliss.


Lately I've been really interested in doing rings. This is a very lovely ring, and I purchased the tutorial on Etsy. The tutorial is delivered as a PDF. It's well written with lots of good detailed photos. I found it very easy to follow. The directions were clear and complete.


Here's a sample page from the tutorial. Remember that the resolution of my blog will not be nearly what the actual tutorial is.


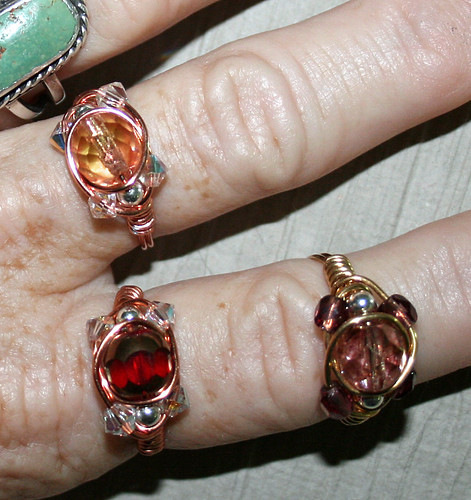
Here are the first practice rings I did using the tutorial.


Mei calls for 22 gauge wire, but I wanted to start out learning with my less expensive craft wire, so I used a 20 gauge tarnish resistant wire in gold and copper, and some leftover beads that I had handy. This worked well, although the 20 gauge doesn't have the beautiful dainty look of Mei's rings. I also experimented with Czech glass firepolish in the center rather than using all Swarovski. Swarovski will definitely be more sparkly so I'll use that next. If you like to use heavier wire with rings I think 20 gauge is probably the heaviest wire that can be used with the small crystals, but 19 gauge might work. Now that I've had some practice I'm going to do some with 22 gauge sterling and gold filled wire. Pearls can also be used in this ring design, and Mei has a picture of a ring made with pearls that is very attractive.


This is a good tutorial for beginners as well as more experienced wire wrappers. I've never done any complex wire work so I consider myself a beginner. I found the directions easy to follow. The tutorial is also very reasonably priced at $6.00 USD.


You can view Mei's wire jewelry on her blogs, WireBliss Jewelry , WireBliss: Handcrafted Wire Wrap Jewelry, and her etsy store, Wirebliss. Be sure to check out her Wire Wrap Donut pendant tutorial that is available at Etsy.

Monday, June 30, 2008

Tutorial Monday-Sharilyn Miller

In my seemingly never-ending quest to impose structure on my blog here is the inaugural post of Tutorial Monday. Eventually I might write some tutorials of my own, but right now I'll be reviewing other's tutorials. These will range from intensive DVD workshops, to down loadable PDF tutorials, on-line tutorials, video tutorials and everything in between. Many will be jewelry tutorials but some will cover other interesting subjects.

First up will be
Sharilyn Miller. Sharilyn Miller is the author of several books, including Bead on A Wire, arguably the best wire jewelry book around. Sharilyn has published four DVDs:
  1. Tribal Treasures Bracelet Workshop


  2. Rings of Beauty Workshop


  3. Bohemian Bangles Workshop


  4. Ethnic Style Jewelry Workshop

These are all reasonably priced through Film Baby at the links above. Current prices range from $29.95 to $39.95. You would pay much more for a workshop, and this is in essence a workshop on DVD. The DVDs range in length from 2.5 hours to 4 hours. If you search Sharilyn Miller's name at the Film Baby website some bundled offers will come up allowing you to buy more than one DVD at reduced rates.


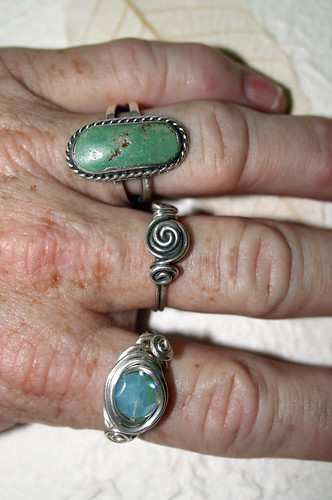
Here are two silver rings I did from Rings of Beauty Workshop. (The top ring is an heirloom turquoise ring that was a gift from my mother-in-law.) The middle spiral ring has been antiqued with silver black. The bottom ring has a Swarovski crystal in it. I had a lot of fun making these. These are only two of the many designs featured on Rings of Beauty Workshop.

I also have some pics up of some copper rings I did. See them here.

I have the Rings of Beauty Workshop, and the Bohemian Bangles Workshop DVDs and have just ordered the new release: Ethnic Style Jewelry Workshop. The DVDs are filmed over Sharilyn's shoulder, so you have a clear close-up view of what she's doing. It very easy to follow the directions. Each DVD contains extra material on various subjects such as antiquing the finish of your jewelry, using the tumbler, polishing, etc. I'm very impressed with the level of detail in the DVDs. Sharilyn goes into enough detail that even beginners will be able to use the DVDs. Each DVD is broken down into sections, so you can easily review just the parts you need. I liked these so well that I actually bought a portable DVD player so I could watch them in my workroom, or any place else I want to work.

Sharilyn also has a great website. Her teaching schedule is posted there. She has a new blog. Her Yahoo group, Bead on a Wire, is my favorite email list.

Tuesday, May 6, 2008

Rings & Sparkly Things


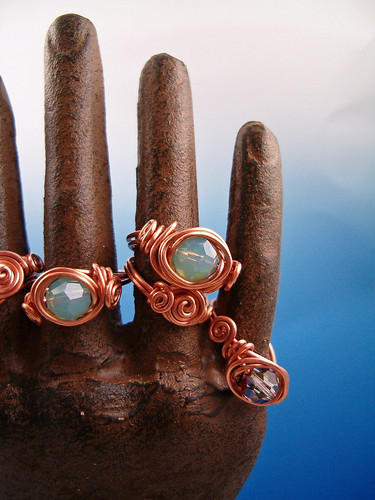
I've been working on some rings from Sharilyn Miller's DVD Rings of Beauty. Here are my first results, done in copper before I move on to the much more expensive sterling silver wire. I'm pretty pleased with them.


Here's a detail shot. I can see it's going to take some practice to make a ring a particular size. I start out wrapping the wire around the mandrel, but when I secure the wire later it changes the size a little, especially on the rings with a bead. The beaded rings always seem to come out bigger than I intended. That's what practice is for though, and over all I'm excited about making them and pleased with my initial results.