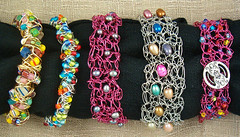
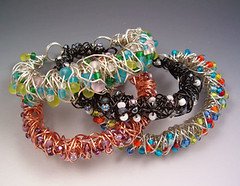
Showing posts with label wire jewelry. Show all posts

Saturday, March 19, 2011

Book Review: Kumihimo Wire Jewelry


I was happy to receive a review copy of Kumihimo Wire Jewelry: Essential Techniques + 20 Jewelry Projects for the Japanese Art of Braiding by Giovanna Imperia.  I've done a lot of different sorts of weaving and have been looking for ways to incorporate weaving with wire jewelry. When I heard about this book coming out I was eager to see it. There are other kumihimo books, but this is the first kumihimo wire jewelry book.

One of the great things about Kumihimo braiding is that it doesn't require an expensive loom.  All of the designs in the book can be done on a Kumihimo disc or plate.  These are widely available for under $10.00 with kits including bobbins starting at $12.00.  If you do have a Kumihimo stand (loom), you can use it instead. 

The projects can be done by novice braiders.  There is a great deal of technical material in the book that also makes it attractive to more experienced braiders. Both solid and hollow forms can be made, and braids may be round, flat, square, lacy, or other shapes. They can be made of all fiber, all wire, or a mixture. Beads can be incorporated into the weave.  The braids can be used as necklaces to hold pendants, or as the necklace itself.  I found the designs done on the square plate to be particularly interesting.  Three dimensional and bi-directional designs can be made by rotating the plate 90 degrees and manipulating the weave.

The book is well done and profusely illustrated with both diagrams and color photography.

Thursday, December 31, 2009

Hand Forged Earrings

Lately I'm obsessed with hammering.  I did some prototype earrings for my new "green" line.  They're green because upcycled parts are used.  In this case, the large rings started out as aluminum spacers in computer hard drives.  I textured them with my hammer. The aluminum makes the earrings ultra lightweight and easy to wear. 

hammered rings

They debuted at Red River Revel and sold well.  I'm going to keep making them as long as I can get the spacers. 

Next I moved on to some sterling silver wire.  These feature hand forged earwires, along with the hand forged earring drop.

hand forged earrings with crystals

I played around and made several different styles of drops as well as several styles of earwires.  Some were antiqued with liver of sulphur and some I left shiny.  These debuted at the Friends and Family show at the Calico Cat and happily sold well.

earring findings


Above are some of the new forged wire earrings and findings.  The leverbacks and headpins at 1-2 o'clock are commercial.  Everything else was made by me.  These have been antiqued but not yet polished.

Here's a group of the earrings at the Friends and Family show at the Calico Cat.

new hand-forged earrings

These aren't hand forged but they do have some wire wrap.  I love making the wrapped donut earrings.  It's hard to find the small earring sized donuts that match, and so far the colors and type of stone I've been able to find is very limited.  The pea pod earrings were wrapped by me using a Hilltribe silver leaf as the pod.  I had to bend the leaf a little and file some notches in it to keep the wire from slipping. 

new earring designs

I'm working on my goals/resolutions post for 2010.  What are your goals?

It's almost time to turn on the TV and watch the ball drop.  Happy New Year everyone!

Thursday, October 22, 2009

Getting Ready for October Shows

new fun ring

My trunk show at the Calico Cat was a success.  I ended up adding a day to the show to take advantage of the downtown crowds gathering for the Ralley Round Greenville event. 

Now I'm running around madly tring to finish getting ready for October 1st Monday Trade Days at Canton.  I'll be driving back and forth to Canton, but the show hours are 8 to 8, so there won't be time for anything else.  I'll be finished with Canton Sunday evening and have to leave again Tuesday morning for Red River Revel in Shreveport, LA.  I'll go via my parent's farm in the Troup area of Texas where I'll drop my son, Stefan, off for a visit with his grandparents.  My part of the show runs Wednesday through Saturday.  It'll be after midnight before I finish packing up so I'll stay over until Sunday. It's likely I'll stay until Monday at my parents so we get a chance to visit.

I'm just hoping I can fit Stefan and his stuff into the car.  Usually the show stuff takes up every available space.

I've spent two days just getting things printed and working on the earring cards.  Plus I made some new rings. I hope to get a picture of some of them up in a post.  a couple of new rings

(Okay, this was supposed to be posted about three weeks ago, but better late than never.)

Tuesday, September 8, 2009

Learning New Techniques-- Hammered Copper Bangles

I purchased several gauges of copper electrical wire at hardware stores and I just made my first cuffs and bangles using the wire. I used an article by Kim St. Jean in summer preview 2009 issue of Step by Step Wire Jewelry for instructions (Bodacious Copper Bangles).

I used 8, 6, and 4 gauge wires.

I cut the wires into various lengths for cuffs and bangles. The bangles are all extra large size. This is so I'll be able to wear them. I very rarely find a commercial bangle big enough to go over my hand.

The next step was annealing the copper. I had never done this before. I was worried about dropping the hot wire on my foot when I quenched it so I dug my Doc Martens out of the closet. Probably I should have worn pants too, but it was about a 100 degrees outside. I did have eye protection and gloves.

annealing copper wire

I enlisted my teen-aged son, Stefan, to take pictures. The sun was so bright that Ralph had to hold a piece of cardboard up to shade the work so I could see the orange glow. I used a fire brick that Ralph made a while back, after he figured out how much the shipping was on the bricks. Ralph kept saying things like, "I hope my brick doesn't explode." The brick was dry as a bone so I can't see why he thought it might explode.

annealing copper wire

I torched the first wire until it had a nice orange glow, let it cool until the orange faded, then used pliers to pick it up and drop it into a pot of water. Ralph scared me by immediately reaching in to the water with a bare hand and pulling out the wire. I didn't realize that the copper cooled so quickly.

quenching

The wire went into the water completely black, but as it cooled bits of the oxidation flaked off revealing pinkish red areas. The top wires have been quenched. The bottom ones are before annealing.

before & after annealing

Stefan and I both picked up one of the annealed wires and accidentally bent it. That's how soft it got. I had no idea the change was that great.

After annealing I hammered the wires flat on top and bottom with a planishing hammer and then used various texturing hammers to add interest to the bracelets. The ends of the wires were pounded flat into paddle shapes. The 8 gauge wire was formed into a serpentine shape before hammering. The serpentine shape was something I wanted to try. It isn't in the article. I had to anneal one of the thicker wires a second time to finish texturing it.

copper wire after hammering

hammering

The bracelets were then annealed again. After this I shaped them using an oval mandrel for the cuffs and a round mandrel for the bangles. I also used a file to clean up the ends a little and round off the paddle shapes. I was going for rustic rather than "fine".

After shaping I put them in a pickle made of vinegar and salt, rinsed, and brushed them with a brass brush.


I used some silver wire for a rivet on the bangles. This was the first time I had done rivets. I did not ball the end of the wire as the article instructed, mostly because I was tired of cleaning the scale off. I don't have a draw plate either, so I used pliers and a regular anvil. I just hammered around the end until I mushroomed it. I lashed one of the cuffs with silver wire. This was a real pain. I had trouble tucking the ends under. I then antiqued three of the bracelets using liver of sulfur. I really liked the way they looked after that. I put several coats of Renaissance Wax on the antiqued ones.

bangles and cuffs

I still have one more rivet to set. I'm going to put Art Clay on two of the remaining bracelets.


three bracelets after antiquing

Tuesday, July 7, 2009

Step by Step Wire Jewelry

One of my goals for this year was to get some jewelry published. Now that the magazine is out I can show you this picture which appears in the summer issue of Step by Step Wire Jewelry.

copper wire bracelet

The photo appears in the reader gallery, WireWorks.

Sunday, June 7, 2009

Wirework Pendant-Bird Nest

Here's a bird nest pendant I made recently. I have read a couple of tutorials on these, but I was going for a more organic look so I just did my own thing. The major part of the nest is one long wire, coiled, and twisted on itself at intervals.


copper & pearl birdsnest

The nest is about an inch in diameter. I used a tarnish resistant 20 gauge copper wire that I got from Bally Beads, and some 26 gauge Artistic Wire to hold the eggs in place. The eggs are pale pink pearls. Now I need to make some out of sterling silver, bare copper, and maybe brass wire. I have some antiqued brass wire that would look good. I think I could use some 24 gauge wire and do earrings.

Monday, February 16, 2009

Working with Steel Wire

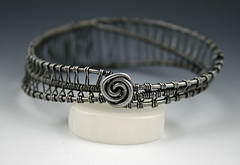
I've wanted to weave with wire for a long time. I finally found some black annealed steel in several gauges. Here is my first creation with the steel wire:


I made it my size. My hand doesn't fold at all so I can almost never find a bangle big enough for my hand.

The steel is surprisingly forgiving. I made some mistakes, took them out, and redid portions all without breaking the wire. Sterling would have broken. All in all I'm pleased with it.

I haven't sealed the wire with anything to protect the finish from rust. Since I'm keeping this one I probably won't seal it. The ones I make to sell will be sealed. Right now I'm leaning toward a matte finish spray sealer. I'm going to do some tests.

I'm having surgery this morning on my right wrist for carpal tunnel. If something doesn't delay the surgery it will be finished by the time this posts. Hopefully all will go well, and I'll make a swift recovery and be back to making jewelry soon.

Tuesday, December 16, 2008

Posting at Etsy


Wow, it's been a long time since I posted on this blog.

Lately I've been experimenting with the jewelry showcases on Etsy. In November I bought a showcase spot and did notice more traffic to my store, Essential Adornment. I also made a sale. I did another showcase for December. No sales, but again increased traffic and some more people favorited the store. For the second showcase I managed to get more items posted. I'll try again after the new year.

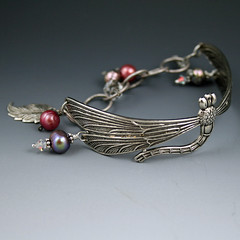
Here are a few items I've posted recently, plus the dragonfly bracelet above:


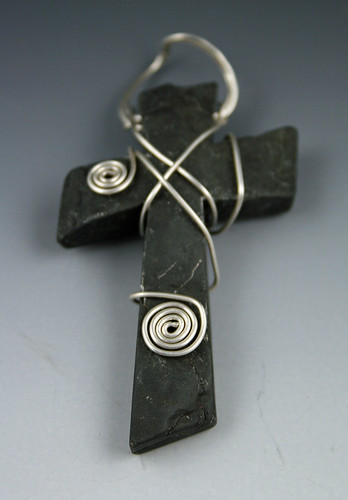
blackstone cross


pearl and hilltribe silver earrings


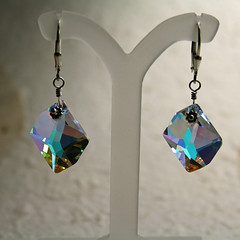
Swarovski crystal earrings

Friday, September 12, 2008

New Jewelry


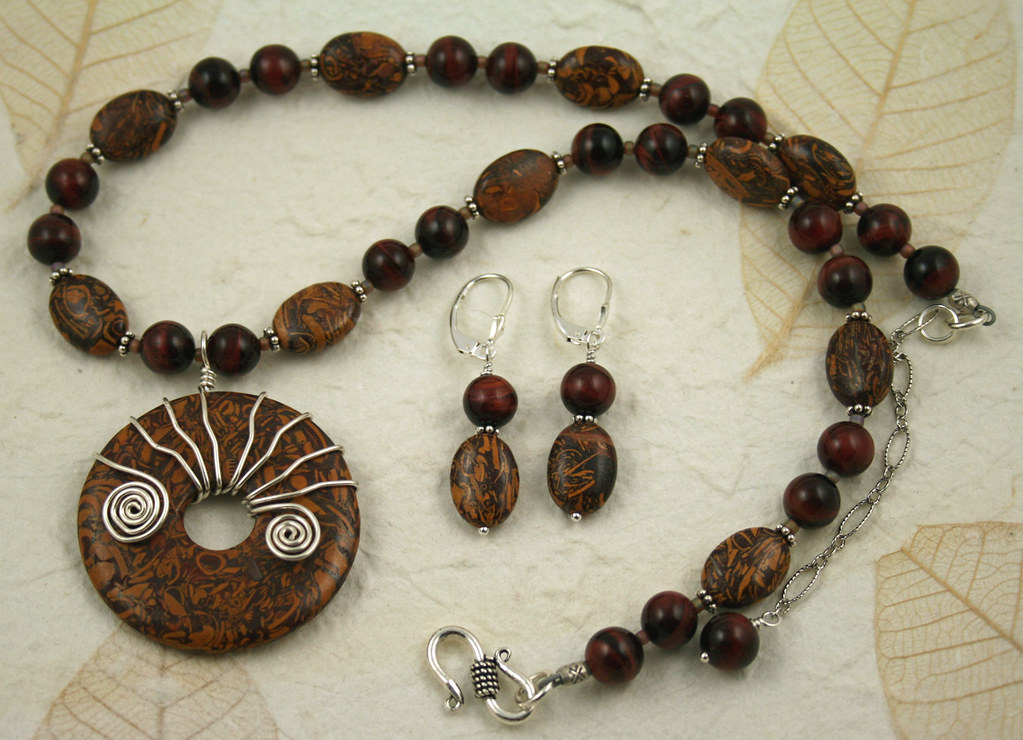
Here's a new wirewrapped donut necklace set that will be going up at my Etsy store Essential Adornment soon.


The donut and the ovals are chrysanthemum stone and the rounds are red tigereye.

Monday, September 1, 2008

Tutorial Monday-Wire Frame Bracelet


I stumbled across this Wire Frame Bracelet tutorial from Belinda Spiwak the other day. The bracelet is somewhat freeform and allows for lots of individualization. While there are good close up pictures of the finished bracelet this tutorial doesn't have step by step pictures. It does have good text instructions. If you have a little experience with wire I think you could have a lot of fun creating your own version of the frame bracelet. The design lends itself well to mixed media type art, found objects, and eclectic mixtures of metals, beads and charms.

For more inspiring wire bracelets, check out the pictures of Susan Lenart Kazmer's beautiful and arresting bracelets.

Belinda includes a tutorial on booklace pendants at this same URL. Check it out!

Monday, July 7, 2008

Tutorial Monday-Mei of Wirebliss

This week for Tutorial Monday I'm reviewing the Sparkly Crystal Ring Tutorial from Mei of WireBliss.


Lately I've been really interested in doing rings. This is a very lovely ring, and I purchased the tutorial on Etsy. The tutorial is delivered as a PDF. It's well written with lots of good detailed photos. I found it very easy to follow. The directions were clear and complete.


Here's a sample page from the tutorial. Remember that the resolution of my blog will not be nearly what the actual tutorial is.


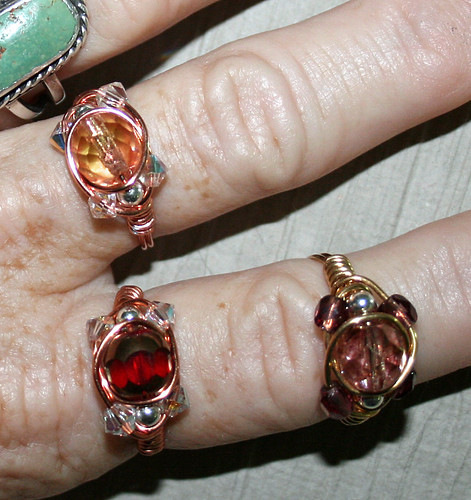
Here are the first practice rings I did using the tutorial.


Mei calls for 22 gauge wire, but I wanted to start out learning with my less expensive craft wire, so I used a 20 gauge tarnish resistant wire in gold and copper, and some leftover beads that I had handy. This worked well, although the 20 gauge doesn't have the beautiful dainty look of Mei's rings. I also experimented with Czech glass firepolish in the center rather than using all Swarovski. Swarovski will definitely be more sparkly so I'll use that next. If you like to use heavier wire with rings I think 20 gauge is probably the heaviest wire that can be used with the small crystals, but 19 gauge might work. Now that I've had some practice I'm going to do some with 22 gauge sterling and gold filled wire. Pearls can also be used in this ring design, and Mei has a picture of a ring made with pearls that is very attractive.


This is a good tutorial for beginners as well as more experienced wire wrappers. I've never done any complex wire work so I consider myself a beginner. I found the directions easy to follow. The tutorial is also very reasonably priced at $6.00 USD.


You can view Mei's wire jewelry on her blogs, WireBliss Jewelry , WireBliss: Handcrafted Wire Wrap Jewelry, and her etsy store, Wirebliss. Be sure to check out her Wire Wrap Donut pendant tutorial that is available at Etsy.

Monday, June 30, 2008

Tutorial Monday-Sharilyn Miller

In my seemingly never-ending quest to impose structure on my blog here is the inaugural post of Tutorial Monday. Eventually I might write some tutorials of my own, but right now I'll be reviewing other's tutorials. These will range from intensive DVD workshops, to down loadable PDF tutorials, on-line tutorials, video tutorials and everything in between. Many will be jewelry tutorials but some will cover other interesting subjects.

First up will be
Sharilyn Miller. Sharilyn Miller is the author of several books, including Bead on A Wire, arguably the best wire jewelry book around. Sharilyn has published four DVDs:
  1. Tribal Treasures Bracelet Workshop


  2. Rings of Beauty Workshop


  3. Bohemian Bangles Workshop


  4. Ethnic Style Jewelry Workshop

These are all reasonably priced through Film Baby at the links above. Current prices range from $29.95 to $39.95. You would pay much more for a workshop, and this is in essence a workshop on DVD. The DVDs range in length from 2.5 hours to 4 hours. If you search Sharilyn Miller's name at the Film Baby website some bundled offers will come up allowing you to buy more than one DVD at reduced rates.


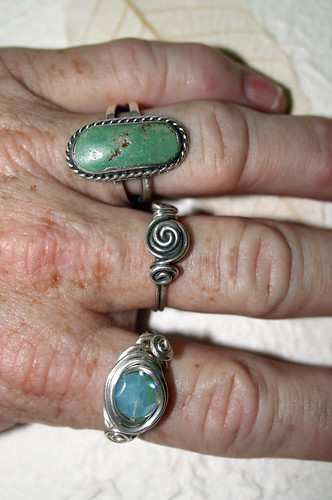
Here are two silver rings I did from Rings of Beauty Workshop. (The top ring is an heirloom turquoise ring that was a gift from my mother-in-law.) The middle spiral ring has been antiqued with silver black. The bottom ring has a Swarovski crystal in it. I had a lot of fun making these. These are only two of the many designs featured on Rings of Beauty Workshop.

I also have some pics up of some copper rings I did. See them here.

I have the Rings of Beauty Workshop, and the Bohemian Bangles Workshop DVDs and have just ordered the new release: Ethnic Style Jewelry Workshop. The DVDs are filmed over Sharilyn's shoulder, so you have a clear close-up view of what she's doing. It very easy to follow the directions. Each DVD contains extra material on various subjects such as antiquing the finish of your jewelry, using the tumbler, polishing, etc. I'm very impressed with the level of detail in the DVDs. Sharilyn goes into enough detail that even beginners will be able to use the DVDs. Each DVD is broken down into sections, so you can easily review just the parts you need. I liked these so well that I actually bought a portable DVD player so I could watch them in my workroom, or any place else I want to work.

Sharilyn also has a great website. Her teaching schedule is posted there. She has a new blog. Her Yahoo group, Bead on a Wire, is my favorite email list.

Saturday, June 21, 2008

Dallas CityArts 2008


I'm trying to be a little more creative with my wire work. Here are a couple of pieces I did for

Dallas CityArts. I'm not entirely satisfied with the bale, below. I'll keep working on it.


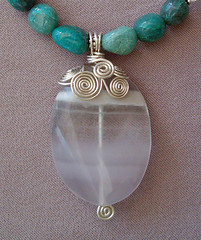
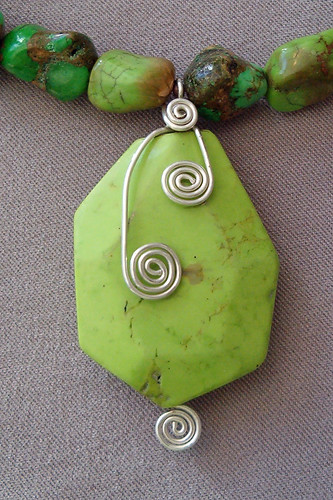
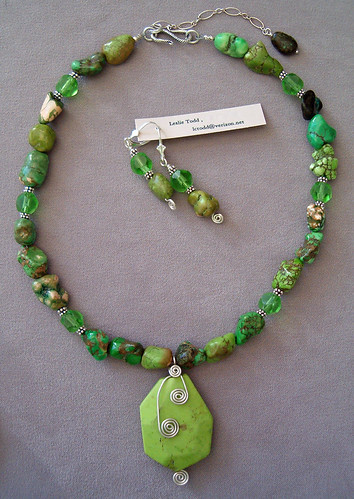
I love the greens in this magnesite set.


It was really, really hot at CityArts. The sponsors provided the artists with popsicles and frozen treats which really helped. The event was held in the beautiful downtown Dallas Arts District. This is another place I really want to go with my camera some day. There's some great architecture there.

I enjoyed this show despite the heat. I had some really good neighbors on either side of my booth. Dan and Lori Dudley of Dirt on Your Skirt Studio had some really creative ceramic art. I especially liked the Day of the Dead series by Dan and the Goddess and Leaf series by Lori.

On the other side were the Kistners of Kris Kistner Photography. He has many great photos. I found the door photo with two doors very arresting.

My cousin Debbie, and her husband, Tony Holman of Holman Pottery, were also showing at CityArts. My favorite is their Fossilware line.
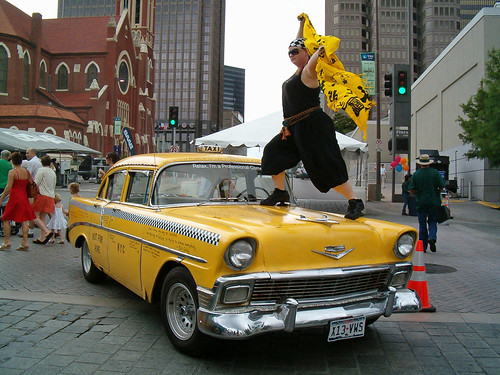
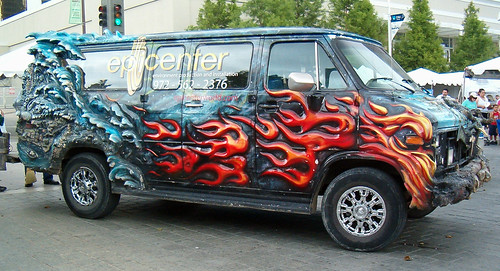
I did get to take some pictures of the art cars. I didn't want to leave my booth for long so I had to be very quick about it. Here are a few shots. Check out the rest of the art car photos on my flickr photostream.


Taxi art car.


Women That Rock art van.


Epicenter art van.

Tuesday, May 6, 2008

Rings & Sparkly Things


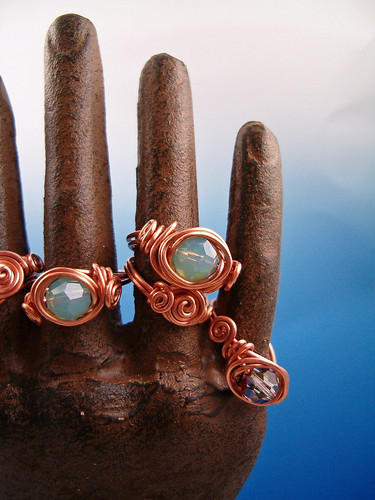
I've been working on some rings from Sharilyn Miller's DVD Rings of Beauty. Here are my first results, done in copper before I move on to the much more expensive sterling silver wire. I'm pretty pleased with them.



Here's a detail shot. I can see it's going to take some practice to make a ring a particular size. I start out wrapping the wire around the mandrel, but when I secure the wire later it changes the size a little, especially on the rings with a bead. The beaded rings always seem to come out bigger than I intended. That's what practice is for though, and over all I'm excited about making them and pleased with my initial results.

Sunday, March 30, 2008

My New Earrings


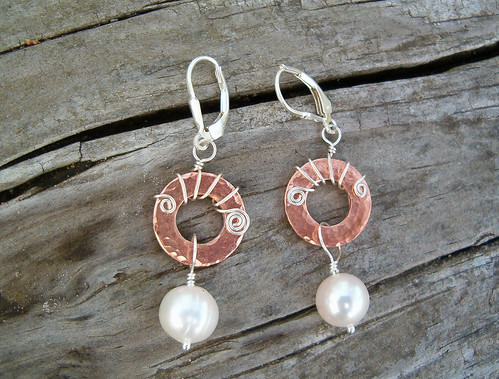
I've been subbing long term for a teacher since the 31st of January. The job will finish the 9th of April. During this time I haven't been able to get much jewelry done, but I did do these earrings. Above are pearls dangling from textured copper rings with sterling silver wire. The rings started their life as washers and I pounded them with a hammer to texture them. These and the opal glass ones below are inspired by Sharilyn Miller. The opal glass ones have been antiqued. The antiquing gives the copper a nice rose gold look.


These are clear sparkling CZ drops with sterling silver in a twisted bird nest wrap. I love these cubic zirconia and have them in several colors.


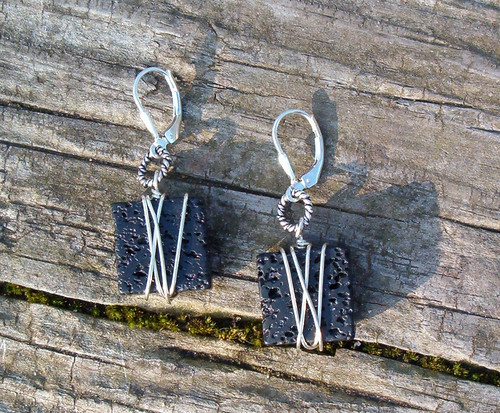
Lava is kind of a new bead on the market. I imagine it is hard to polish it. Here I've made a spiral for the front.


These are wrapped in sterling silver wire.


Monday, December 3, 2007

Twisted Wire Bracelets


I had a commission to do a set of three twisted wire bracelets so here they are. I used a tarnish resistant copper wire with various colors of glass beads for these.


I'm so pleased with these I did a couple more in different colors. No photos yet. Next I'm doing bird nests, I think, with pearls and crystals for eggs.

The last scheduled show for this year is over, although I may do a show or two at the schools if I can fit them in. I'm subbing the next three days so that will slow me down. This time of year, between now and spring shows is a good time to work on my website and also on more complex jewelry. I think I'll concentrate on wire work and the art clay.

Sunday, October 7, 2007

Blogging for Metal Chik

After posting the feed for the Metal Chik video on my Indiepublic page I received an email from Lindsey Chen, who works on the show. To make a short story shorter I am now blogging on Metal Chik. I'm pretty excited about it. My first blog on Metal Chik, Lean and Clean Wire Jewelry, was published October 5th. It's about Kathy Frey and her new book Elegant Wire Jewelry.

Monday, September 10, 2007

crocheting with wire


I've just started crocheting with wire and have made a few bracelets and a necklace. Here are some of the bracelets:


The three bracelets on the right were crocheted with 24 gauge Artistic Wire and freshwater pearls or seed beads. I probably wouldn't want to crochet with anything heavier than 24 gauge. Lots of people use 28 gauge, but I wanted a studier bracelet.


I have collected several jewelry crochet books. Crocheted Wire Jewelry is one of my favorites. The instructions are clear and well-written. I like it that several of the projects are unusual and very creative. I especially liked the cube pendant and the earrings made with tiny stitches. Every time I look at the book I get ideas for my own designs. The hairpin lace designs are gorgeous.

Wednesday, September 5, 2007

Quadrangle

It's crunch time as I try to finish up a few more things and get all my gear ready for my first fall show. Naturally it's raining, so I won't be able to waterproof the canopy as I had planned.


This weekend I'll be at the Quadrangle in Texarkana, USA. For those who aren't aware, Texarkana is on the border literally between Texas and Arkansas. Even the show will straddle the border. Here are some wire bracelets that I've been working on:


My aunt and cousin, of Tejas Trade, will also be showing with their jewelry.