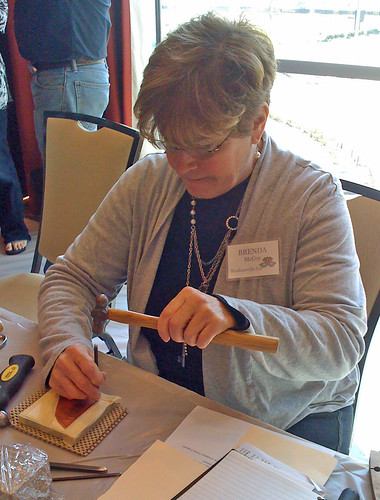
Saturday and Sunday I had Precious Little with Stuffsmith Keith Lo Bue. This was a two day class so I'm covering it in one post. I'm kicking myself now for not taking more photos, especially of the cool things the other students made. It's easy to just get caught up in what's going on in class and forget photography.
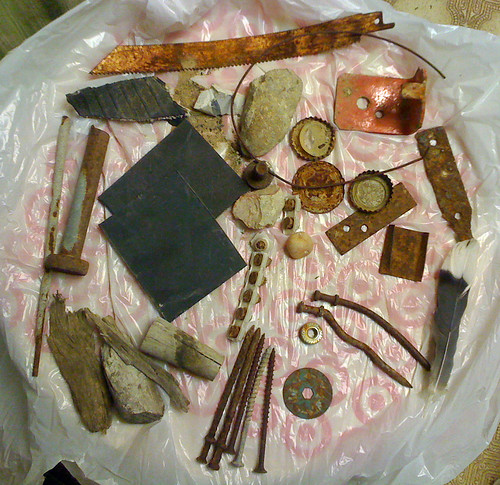
Saturday one of the first things that happened was we had to get a plastic bag and go outside and forage for stuff. None of us were prepared for the cold front and very windy weather that had hit Houston so we ventured out after putting on warmer clothes.
There were a lot more things out there than I thought there would be. Who knew the parking lot was so loaded with nails? Fortunately this was a part of the parking lot that isn't used. The hotel was only built a little over a year or so ago so there was still debris from the construction.
Here's my stuff, minus the things I used later and the section of rebar I found:
 Back inside we were instructed to select 3 things from what we had brought to the workshop from home that we didn't think we'd use and discard them on a table. Then we all took turns picking from the discards. I picked three nails discarded by Pedro Quintero from Venezuela, and a grouping of small driftwood from the east coast (okay, I confess, I cannot remember the other student's names), and a sewing machine bobbin.
Then Keith told us to make something wearable (or that could be held up for at least a few seconds like we were wearing it) using only one of the things we found outside, one thing we brought from home, and one thing we took off the table of discards. If one of the three things was wire, for example, we could use other wires because it was all one type of thing. Oh my...what to do?
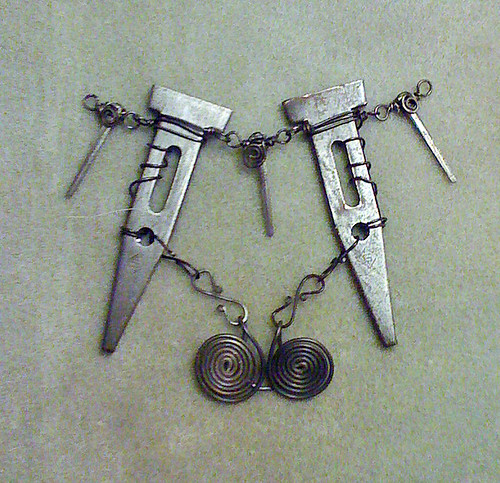
I had found two things that looked like nails on steroids. Keith told me they are spacers used in concrete block construction. I started playing with them and the three nails and worked out a pleasing arrangement for a necklace. The thing I used from home was black annealed steel wire. I had no choice in that since I had to have something to "string" the necklace on.
The "nail" spacers were completely covered in rust when I found them. Sandpaper, then various dremel attachments took the rust off. It was a surprisingly good feeling watching the metal reveal itself.
My first thought was to weave the wire into a collar. I did a couple of rows of this but the big spacers wanted to turn in the weave so I took it apart and wire wrapped it. One of the things I had to do was fix the pieces where they wouldn't fall out if the necklace was turned upside down. The two big spacers needed something in front to balance them so I used some rebar wire to make coils.
This is what I ended up with and the end of the day:
Back inside we were instructed to select 3 things from what we had brought to the workshop from home that we didn't think we'd use and discard them on a table. Then we all took turns picking from the discards. I picked three nails discarded by Pedro Quintero from Venezuela, and a grouping of small driftwood from the east coast (okay, I confess, I cannot remember the other student's names), and a sewing machine bobbin.
Then Keith told us to make something wearable (or that could be held up for at least a few seconds like we were wearing it) using only one of the things we found outside, one thing we brought from home, and one thing we took off the table of discards. If one of the three things was wire, for example, we could use other wires because it was all one type of thing. Oh my...what to do?
I had found two things that looked like nails on steroids. Keith told me they are spacers used in concrete block construction. I started playing with them and the three nails and worked out a pleasing arrangement for a necklace. The thing I used from home was black annealed steel wire. I had no choice in that since I had to have something to "string" the necklace on.
The "nail" spacers were completely covered in rust when I found them. Sandpaper, then various dremel attachments took the rust off. It was a surprisingly good feeling watching the metal reveal itself.
My first thought was to weave the wire into a collar. I did a couple of rows of this but the big spacers wanted to turn in the weave so I took it apart and wire wrapped it. One of the things I had to do was fix the pieces where they wouldn't fall out if the necklace was turned upside down. The two big spacers needed something in front to balance them so I used some rebar wire to make coils.
This is what I ended up with and the end of the day:
 At the end of the day we presented our jewelry to the class and discussed our process of making the jewelry.
All of the other students made impressive wearable items and demonstrated considerable creativity. Some made more than one item. Particularly interesting was a ring made by woodcarver Lynn Bacon-Trzcinski. More about her ring in my next post.
I was also very impressed with a brooch made by another student. Once again, I apologize for forgetting names. The brooch was constructed of a couple of bottle caps if I remember correctly. She had chosen a brass dog "id tag"--not the usual kind, but a brass capsule that screwed apart. There was a split ring on the tag. She constructed the pin for the brooch from the split ring on the dog tag. I would never have been able to do that. If I'd thought about it I'd have dismissed the idea as impossible. She did say the split ring was the very devil to straighten out. This is very creative thinking.
Keith asked me if I would have made the same piece without the restrictions. I think the restrictions actually helped me--I'd have spent too much time deciding what to do and use and wouldn't have learned nearly as much or gotten as close to a finished project as I did. I'm going to use this idea in the future--not all the time--but once in a while to push myself. I have a lot of trouble "coloring outside the lines." I also have a tendency to procrastinate and over-engineer things. I found that working this way was very satisfying.
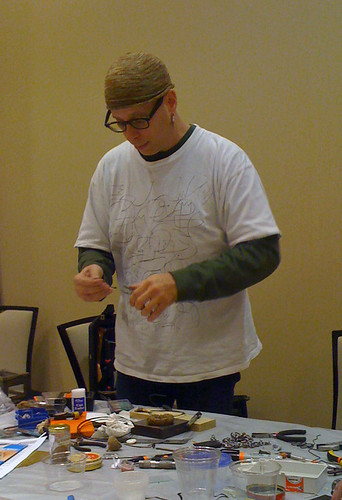
Sunday we were given the assignment of working on something that had some aspect of autobiography, or continuing on the project we did on Saturday. We also spent time learning the proper way to drill holes in metal, glass and other items. I now understand why my drill bits would only work for the first two or three holes. I think I'll be using a lot fewer drill bits in the future. I had never drilled glass and I feel that I can do that now. Here Keith demonstrates techniques for coiling the rebar wire, which handles a little different from the usual jewelry wires.
At the end of the day we presented our jewelry to the class and discussed our process of making the jewelry.
All of the other students made impressive wearable items and demonstrated considerable creativity. Some made more than one item. Particularly interesting was a ring made by woodcarver Lynn Bacon-Trzcinski. More about her ring in my next post.
I was also very impressed with a brooch made by another student. Once again, I apologize for forgetting names. The brooch was constructed of a couple of bottle caps if I remember correctly. She had chosen a brass dog "id tag"--not the usual kind, but a brass capsule that screwed apart. There was a split ring on the tag. She constructed the pin for the brooch from the split ring on the dog tag. I would never have been able to do that. If I'd thought about it I'd have dismissed the idea as impossible. She did say the split ring was the very devil to straighten out. This is very creative thinking.
Keith asked me if I would have made the same piece without the restrictions. I think the restrictions actually helped me--I'd have spent too much time deciding what to do and use and wouldn't have learned nearly as much or gotten as close to a finished project as I did. I'm going to use this idea in the future--not all the time--but once in a while to push myself. I have a lot of trouble "coloring outside the lines." I also have a tendency to procrastinate and over-engineer things. I found that working this way was very satisfying.
Sunday we were given the assignment of working on something that had some aspect of autobiography, or continuing on the project we did on Saturday. We also spent time learning the proper way to drill holes in metal, glass and other items. I now understand why my drill bits would only work for the first two or three holes. I think I'll be using a lot fewer drill bits in the future. I had never drilled glass and I feel that I can do that now. Here Keith demonstrates techniques for coiling the rebar wire, which handles a little different from the usual jewelry wires.
 I got a little design work done on my autobiographical piece done, but no construction. It did finish up the necklace I started on Saturday.
Keith Lo Bue is featured in the current issue of Belle Amoire Jewelry and his jewelry is on the cover. It's a geat article. Check it out:
I got a little design work done on my autobiographical piece done, but no construction. It did finish up the necklace I started on Saturday.
Keith Lo Bue is featured in the current issue of Belle Amoire Jewelry and his jewelry is on the cover. It's a geat article. Check it out:
Friday I had Mixed Metal Milagros with Richard Salley. Milagros are small religious charms used in many Latin American countries, particularly Mexico and Peru. They are also quite common here in Texas and other parts of the Southwestern United States. Read about them here.
Richard told us he was inspired by Lorena Angulo's beautiful hearts and other jewelry to make his own "Milagros." (Lorena was also teaching at Adorn Me. I hope to take a class from her someday.)
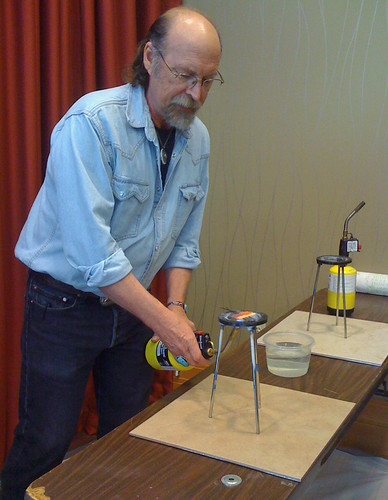
We did some torch enameling in this class in addition to using mixed metals. Here's Richard Salley demonstrating torch enameling.
 I had a copy of a gem tintype that I used in my pendant, along with a scrap of etched brass that I sawed into a frame. I used copper and brass. The flaming heart was sawn from copper and enameled. I left the copper showing in the heart with the color from the torch instead of pickling it.
 Everything in this piece is riveted or put together with micro-bolts. The young woman looks likes she's waiting and she has an introspective expression on her face. I imagine she is waiting for her beau, who perhaps is off on a trip or gone to war. I call this pendant "Waiting for my Love."
Thursday evening was Band Groupie with Melissa Manley. Bren and I were both in this class. Melissa is a great teacher and is so much fun in class. She really sets everyone to ease and explains things well.
Melissa had a handy chart to help us determine how long to cut the ring stock for a particular size. Of course, despite measuring twice and cutting once, I still cut mine one millimeter too short. This represents 1/4 size if I read the chart correctly. Next time I'll cut to the side of the line instead of right on top of it.
We textured our rings, bent them into a "D" shape, and then pick soldered them. I had never pick soldered so I was pleased to get some experience with this. The rings were then shaped, bevels filed and some polishing and antiquing was done. I was able to wear my ring, just not on the finger I had intended! My seam was looking pretty good--not showing at all--until I antiqued the ring. I think a little more polish work will take care of that.
 This is Bren's beautiful ring. Below is mine:
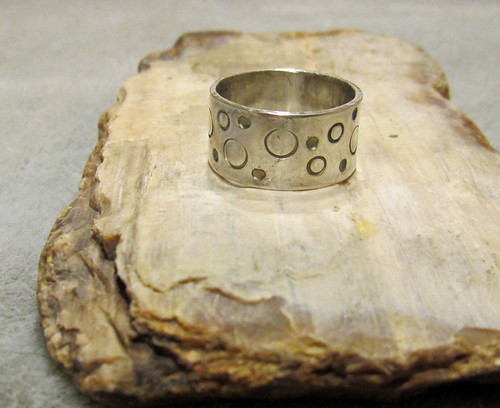 I used my hammer to gently texture the edge of my band. Now that I'm home I'll do some more polishing and put it in the tumbler for a while.
Thursday was Creating Hollow Forms in Color with Susan Lenart Kazmer. This was the first time I had done any enameling.
After some instruction from Susan I attempted counter enameling of my copper domes. Counter enameling is the enamel put on the back of the piece. It's intended to strengthen the piece so it doesn't get bent later, causing glass to pop off.
The biggest problem I had with this was dropping the little pieces before I got them to the torch. I did finally get the backs torch enameled.
The line for the torches was long so I switched to the kiln for the fronts. I experimented with various colors and also enameled a key, and the tips of some copper wires. The copper wires were done with the torch. It's a lot of fun seeing the colors pop out after firing. At first everything is dark but when it cools, or after you quench it, the color shows. The color on the enamels can change with each firing. The brown looking piece is supposed to be Victorian Red. The backs of the domes, in particular, would have benifited from additional firings if I'd had more time. Each piece was fired twice, except for the wires which were fired 4 or 5 times each.
Here's my completed piece:
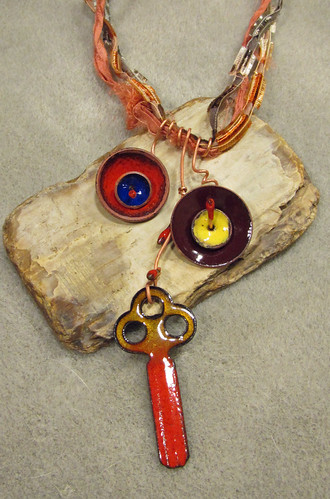 You can see I had a little trouble getting the enamel out to the edges of the copper. I'm definitely going to be ordering some enamels so I can work on the technique.
Bren, meanwhile, was in Keith Lo Bue's Weathering and Distressing class learning how to make things look old. She came back with some boxes with handmade wire clasps on them, distressed down to the wormholes.
Up next: Part B: Band Groupie with Melissa Manley.
You can see I had a little trouble getting the enamel out to the edges of the copper. I'm definitely going to be ordering some enamels so I can work on the technique.
Bren, meanwhile, was in Keith Lo Bue's Weathering and Distressing class learning how to make things look old. She came back with some boxes with handmade wire clasps on them, distressed down to the wormholes.
Up next: Part B: Band Groupie with Melissa Manley.
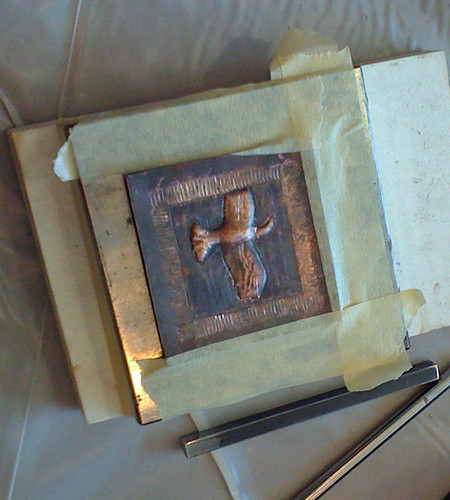
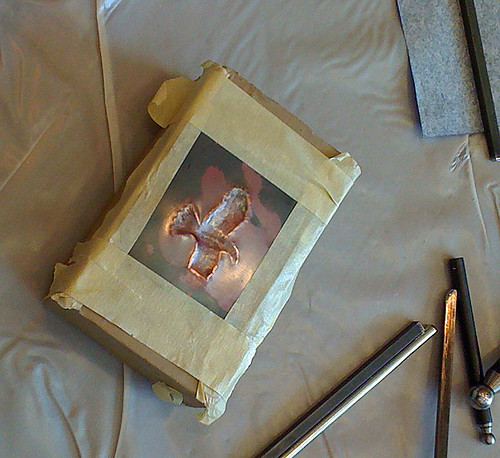
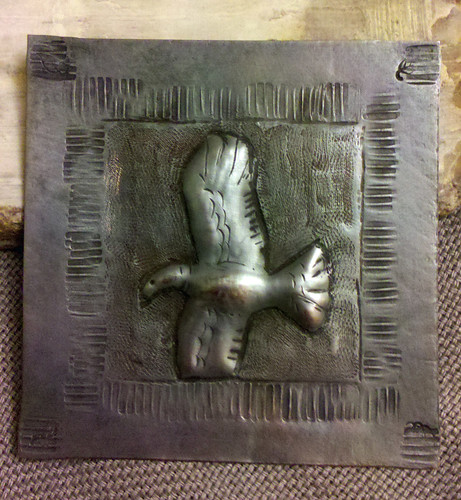
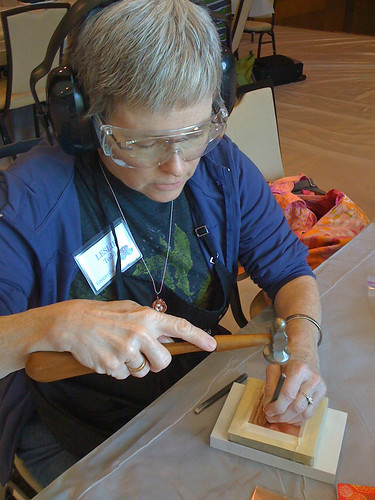
I'm in Houston for the week attending Adorn Me! Today was Tool Making with Richard Salley. My roomie Bren and I were both in this class. We're also taking the Repousse without Pitch class taught by Richard tomorrow. The idea is that we use the tools we make today in the class tomorrow. I had a little anxiety about whether I would get some tools made for the class tomorrow. It turned out that making the tools was quicker and easier than I thought it would be. At the same time some things I thought would be easy turned out to be a little tricky. We got to play with power tools! There were several bench grinders with various grind stones and polishing wheels, plus a couple of belt sanders.
Bren and I both agreed that the line tools were easy. I tried a teardrop tool and it was harder. I used a file to cut straight lines across the face of one tool, and deepened the cuts with my saw. This made a 4 line stamp. It was really hard to get the face of this tool squared so it would stamp correctly. It's still not perfect, but it's usable. One clever student in class did a set of tools that make a dragonfly about 3/4 of an inch long when put together.
Bren's tools:
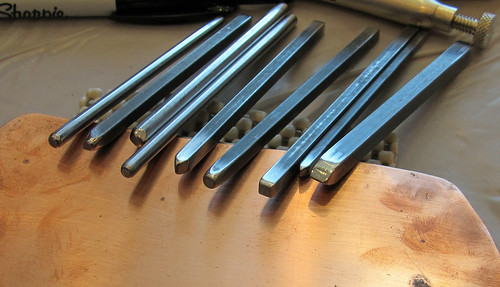 My tools:
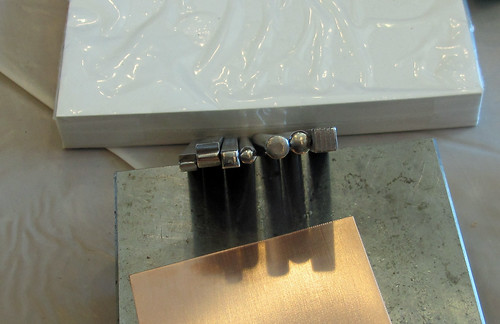 L. to R.: short line tool, long line tool, square punch, teardrop punch, round planishing, round punch, 4 line stamp.
I also did a curved line. The middle of the line came out a little wider than the ends so it looks a little like a waning moon, or the curved end of a flower petal. I decided I liked it that way so I left it.
Here is Bren with instructor Richard Salley:
L. to R.: short line tool, long line tool, square punch, teardrop punch, round planishing, round punch, 4 line stamp.
I also did a curved line. The middle of the line came out a little wider than the ends so it looks a little like a waning moon, or the curved end of a flower petal. I decided I liked it that way so I left it.
Here is Bren with instructor Richard Salley:
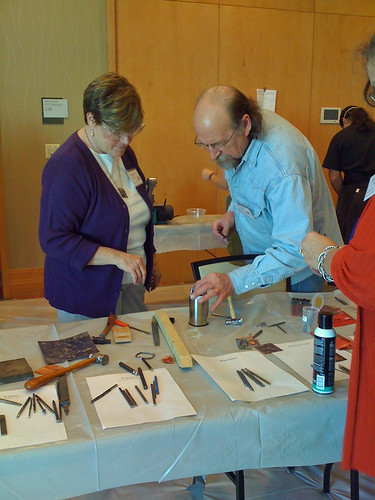 We've both taken classes from Richard before. He's an excellent instructor. The class also included hardening and tempering of the tools, and twisting the middle of the tools to give it a decorative spiral and a place to hold it. Bren and I haven't spiraled any of our tools yet.
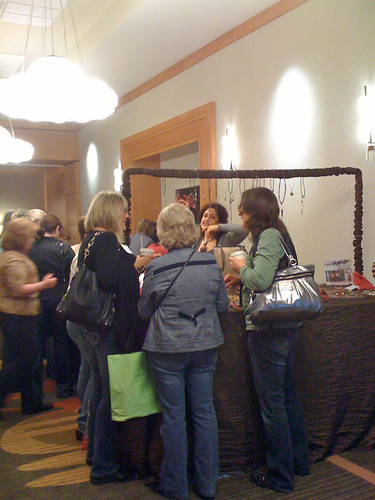
Susan Lennart Kazmer set up a store right before lunch. Here's a shot of the crowd around their booth. Maybe I'll do a little shopping there this week.