
Saturday one of the first things that happened was we had to get a plastic bag and go outside and forage for stuff. None of us were prepared for the cold front and very windy weather that had hit Houston so we ventured out after putting on warmer clothes.
There were a lot more things out there than I thought there would be. Who knew the parking lot was so loaded with nails? Fortunately this was a part of the parking lot that isn't used. The hotel was only built a little over a year or so ago so there was still debris from the construction.
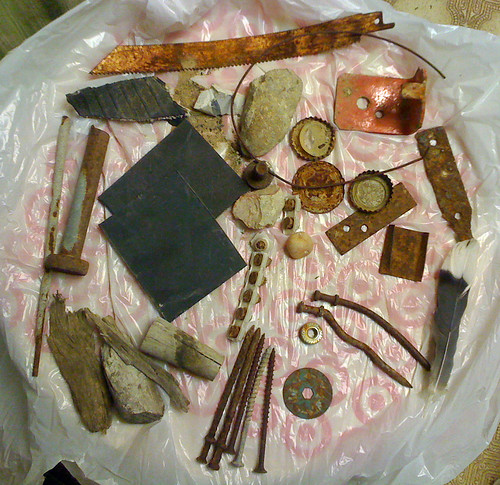
Here's my stuff, minus the things I used later and the section of rebar I found:
Back inside we were instructed to select 3 things from what we had brought to the workshop from home that we didn't think we'd use and discard them on a table. Then we all took turns picking from the discards. I picked three nails discarded by Pedro Quintero from Venezuela, and a grouping of small driftwood from the east coast (okay, I confess, I cannot remember the other student's names), and a sewing machine bobbin.
Then Keith told us to make something wearable (or that could be held up for at least a few seconds like we were wearing it) using only one of the things we found outside, one thing we brought from home, and one thing we took off the table of discards. If one of the three things was wire, for example, we could use other wires because it was all one type of thing. Oh my...what to do?
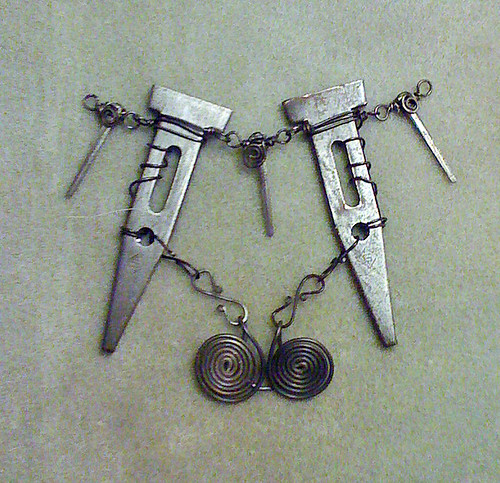
I had found two things that looked like nails on steroids. Keith told me they are spacers used in concrete block construction. I started playing with them and the three nails and worked out a pleasing arrangement for a necklace. The thing I used from home was black annealed steel wire. I had no choice in that since I had to have something to "string" the necklace on.
The "nail" spacers were completely covered in rust when I found them. Sandpaper, then various dremel attachments took the rust off. It was a surprisingly good feeling watching the metal reveal itself.
My first thought was to weave the wire into a collar. I did a couple of rows of this but the big spacers wanted to turn in the weave so I took it apart and wire wrapped it. One of the things I had to do was fix the pieces where they wouldn't fall out if the necklace was turned upside down. The two big spacers needed something in front to balance them so I used some rebar wire to make coils.
This is what I ended up with and the end of the day:
At the end of the day we presented our jewelry to the class and discussed our process of making the jewelry.
All of the other students made impressive wearable items and demonstrated considerable creativity. Some made more than one item. Particularly interesting was a ring made by woodcarver Lynn Bacon-Trzcinski. More about her ring in my next post.
I was also very impressed with a brooch made by another student. Once again, I apologize for forgetting names. The brooch was constructed of a couple of bottle caps if I remember correctly. She had chosen a brass dog "id tag"--not the usual kind, but a brass capsule that screwed apart. There was a split ring on the tag. She constructed the pin for the brooch from the split ring on the dog tag. I would never have been able to do that. If I'd thought about it I'd have dismissed the idea as impossible. She did say the split ring was the very devil to straighten out. This is very creative thinking.
Keith asked me if I would have made the same piece without the restrictions. I think the restrictions actually helped me--I'd have spent too much time deciding what to do and use and wouldn't have learned nearly as much or gotten as close to a finished project as I did. I'm going to use this idea in the future--not all the time--but once in a while to push myself. I have a lot of trouble "coloring outside the lines." I also have a tendency to procrastinate and over-engineer things. I found that working this way was very satisfying.
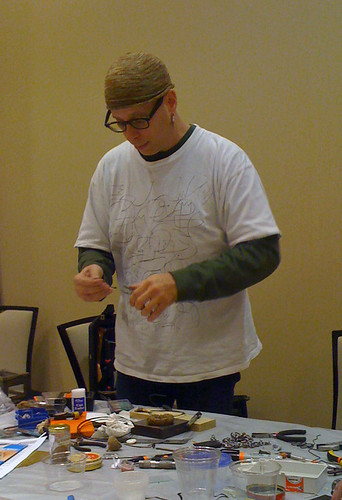
Sunday we were given the assignment of working on something that had some aspect of autobiography, or continuing on the project we did on Saturday. We also spent time learning the proper way to drill holes in metal, glass and other items. I now understand why my drill bits would only work for the first two or three holes. I think I'll be using a lot fewer drill bits in the future. I had never drilled glass and I feel that I can do that now. Here Keith demonstrates techniques for coiling the rebar wire, which handles a little different from the usual jewelry wires.
I got a little design work done on my autobiographical piece done, but no construction. It did finish up the necklace I started on Saturday.
Keith Lo Bue is featured in the current issue of Belle Amoire Jewelry and his jewelry is on the cover. It's a geat article. Check it out:

4 comments:
Thank you so much for your posts Leslie. I SOOOOO wanted to be there this year. All your work has been great! Thank you for sharing.
Thanks, Julie. We missed you! It wasn't the same without you. We were going to send you some show and tell text messages but we didn't have your number. Maybe we can all go next year.
Wow Leslie! I am impressed! I would have loved to do what you did on Saturday~pushing myself, sharing with each other and then using one of the pieces you brought from home! Tough decisions indeed...but look at what you designed! vErY cOoL!
diane
xoxo
Thanks Diane! Keith teaches Precious Little classes that are longer too--one and two week ones, although I think the two week ones are in Australia. It would be cool to do one of those.
I will be making a second necklace using the same rules. If you look in the photo of stuff I found there's a round rust/teal saw blade at the bottom. I'm going to pair it with the little driftwood pieces I got and do a necklace.
Post a Comment